
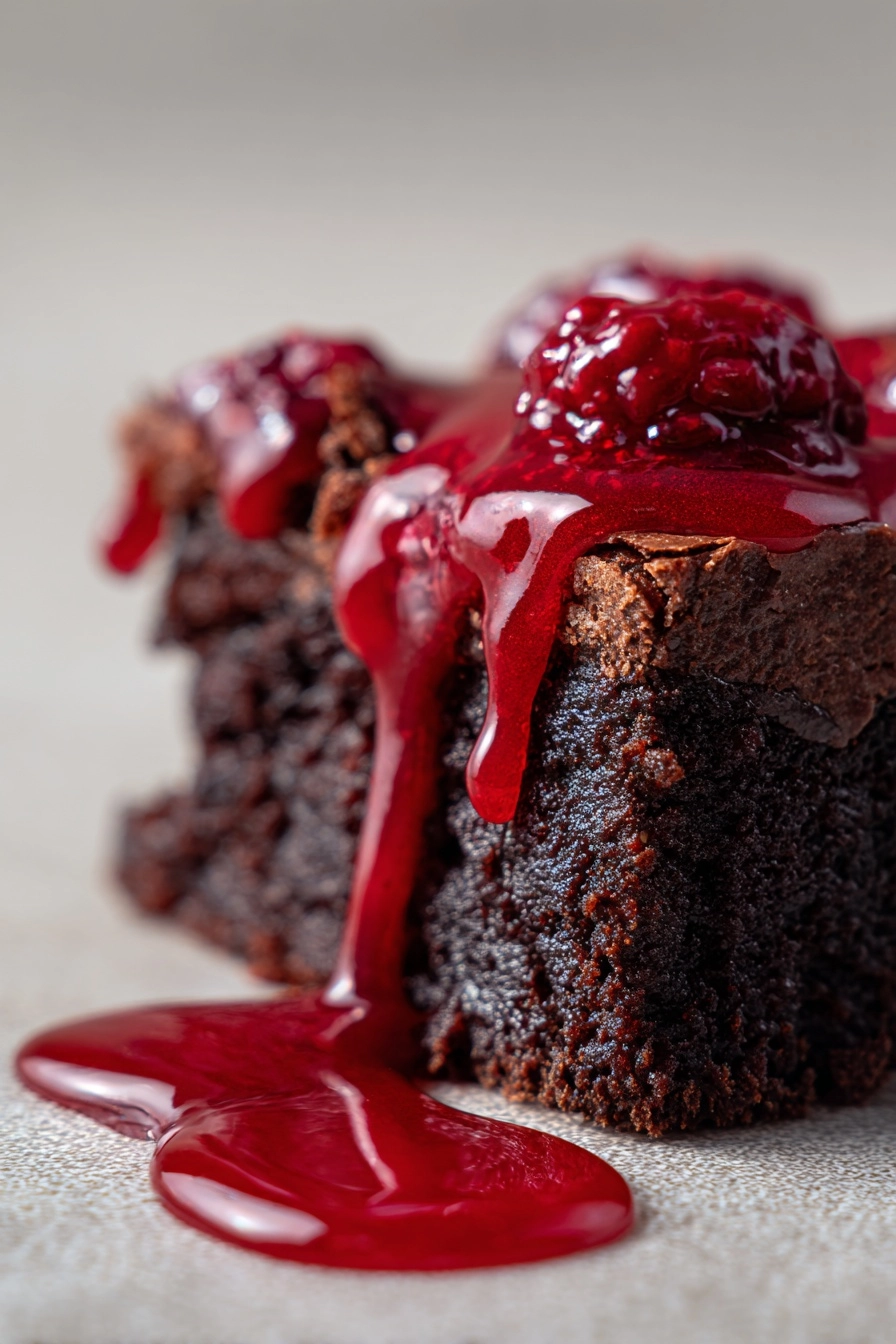
Introduction to Vampire Bite Brownies
As a busy mom, I know how challenging it can be to whip up something special, especially when the kids are clamoring for a treat. That’s where these Vampire Bite Brownies come in! They’re not just any brownies; they’re a deliciously spooky dessert that’s perfect for Halloween or any themed party. With a rich chocolate base and a gooey raspberry filling that resembles blood, these brownies are sure to impress your loved ones. Plus, they’re quick to make, so you can spend less time in the kitchen and more time enjoying the fun!
Why You’ll Love This Vampire Bite Brownies
These Vampire Bite Brownies are a delightful blend of ease and flavor. They come together in just under an hour, making them a perfect solution for busy days. The rich chocolate flavor paired with the sweet, tangy raspberry jam creates a taste sensation that’s hard to resist. Plus, they’re a hit with kids and adults alike, ensuring smiles all around. Who knew a spooky treat could be so simple and satisfying?
Ingredients for Vampire Bite Brownies
Gathering the right ingredients is the first step to creating these delightful Vampire Bite Brownies. Here’s what you’ll need:
- Unsalted butter: This adds richness and moisture to the brownies, making them fudgy and decadent.
- Granulated sugar: Sweetens the brownies and helps create that perfect chewy texture.
- Large eggs: They bind the ingredients together and provide structure to the brownies.
- Vanilla extract: A splash of vanilla enhances the chocolate flavor, adding warmth and depth.
- All-purpose flour: This is the base of the brownies, giving them body and stability.
- Unsweetened cocoa powder: The star of the show! It brings that rich chocolate flavor we all crave.
- Salt: Just a pinch balances the sweetness and enhances the overall flavor.
- Raspberry jam: This gooey filling mimics blood, adding a fun twist and a burst of fruity flavor.
- Red food coloring (optional): For those who want an extra spooky effect, a few drops can intensify the ‘blood’ look.
For exact measurements, check the bottom of the article where you can find everything listed for easy printing. Happy baking!
How to Make Vampire Bite Brownies
Step 1: Preheat and Prepare
First things first, preheat your oven to 350°F (175°C). This ensures your brownies bake evenly. While the oven warms up, grab a 9×13 inch baking pan and grease it well. You can use butter or cooking spray for this. A well-greased pan helps the brownies release easily after baking. Trust me, you don’t want to lose any of that deliciousness!
Step 2: Mix the Wet Ingredients
In a large bowl, melt the unsalted butter. I usually do this in the microwave for about 30 seconds. Once melted, stir in the granulated sugar until it’s well combined. Next, add the eggs one at a time, mixing thoroughly after each addition. Finally, stir in the vanilla extract. This mixture should be smooth and creamy, setting the stage for those rich Vampire Bite Brownies!
Step 3: Combine the Dry Ingredients
In another bowl, whisk together the all-purpose flour, unsweetened cocoa powder, and salt. This step is crucial! It helps to evenly distribute the cocoa and salt throughout the brownies. Make sure there are no lumps in the cocoa powder. A smooth dry mixture will lead to a fudgy texture that everyone will love!
Step 4: Combine Wet and Dry Mixtures
Now it’s time to bring the two mixtures together. Gradually add the dry ingredients to the wet ingredients, mixing gently until just combined. Be careful not to overmix; a few lumps are perfectly fine. This is where the magic happens, as the rich chocolate flavor starts to come alive. Your batter should be thick and luscious!
Step 5: Layer the Brownies
Pour half of the brownie batter into your prepared pan, spreading it evenly. Then, drop spoonfuls of raspberry jam over the brownie layer. Use a knife to swirl the jam slightly, creating a fun marbled effect. Pour the remaining brownie batter over the jam layer and spread it out evenly. This layering is what gives the brownies their spooky “bite”!
Step 6: Bake to Perfection
Place the pan in the preheated oven and bake for 30-35 minutes. To check for doneness, insert a toothpick into the center. If it comes out with a few moist crumbs, you’re good to go! Let the brownies cool in the pan before cutting them into squares. The anticipation will make them taste even better!
Tips for Success
- Use room temperature eggs for better mixing and texture.
- Don’t overbake! Check for doneness a few minutes early to keep them fudgy.
- Let the brownies cool completely before cutting for cleaner edges.
- For a fun twist, add chocolate chips to the batter for extra richness.
- Store leftovers in an airtight container to keep them fresh and moist.
Equipment Needed
- 9×13 inch baking pan: A standard size for brownies; you can also use an 8×8 inch pan for thicker brownies.
- Mixing bowls: Use any size, but a large bowl is best for mixing the batter.
- Whisk: A whisk helps combine dry ingredients; a fork works in a pinch!
- Spatula: Perfect for spreading the batter evenly in the pan.
- Toothpick: Essential for checking doneness; a skewer can be a great substitute.
Variations
- Nutty Brownies: Add chopped walnuts or pecans to the batter for a delightful crunch.
- Gluten-Free Option: Substitute all-purpose flour with a gluten-free blend for a safe treat.
- Vegan Version: Replace eggs with flax eggs and use a plant-based butter alternative.
- Minty Twist: Incorporate a few drops of peppermint extract for a refreshing flavor.
- Spicy Kick: Add a pinch of cayenne pepper or chili powder for a surprising heat!
Serving Suggestions
- Pair with a scoop of vanilla ice cream for a delightful contrast to the rich brownies.
- Serve with fresh raspberries on the side to enhance the fruity flavor.
- Drizzle with chocolate sauce for an extra indulgent treat.
- Present on a spooky-themed platter for Halloween parties.
- Enjoy with a warm cup of coffee or hot cocoa for a cozy dessert experience.
FAQs about Vampire Bite Brownies
Can I make Vampire Bite Brownies ahead of time?
Absolutely! These brownies can be made a day in advance. Just store them in an airtight container at room temperature. They’ll stay fresh and delicious, ready to impress your guests!
What can I use instead of raspberry jam?
If raspberry jam isn’t your thing, feel free to swap it out for strawberry or cherry jam. You could even use a homemade fruit compote for a personal touch. The key is to keep that fruity flavor!
How do I store leftover brownies?
To keep your Vampire Bite Brownies fresh, store them in an airtight container. They’ll last up to a week, but I doubt they’ll last that long with how delicious they are!
Can I freeze these brownies?
Yes, you can freeze them! Just wrap individual brownies in plastic wrap and place them in a freezer-safe bag. They’ll be good for up to three months. Perfect for a spooky treat later!
What’s the best way to serve these brownies?
For a fun presentation, serve them with a scoop of vanilla ice cream and a drizzle of chocolate sauce. You can even sprinkle some crushed nuts on top for added texture. Enjoy the spooky delight!
Final Thoughts
Making Vampire Bite Brownies is more than just baking; it’s about creating memories with your loved ones. The joy on your kids’ faces when they see these spooky treats is priceless. Plus, the rich chocolate and tangy raspberry combination is a flavor explosion that everyone will adore. Whether it’s for Halloween or a fun family night, these brownies are sure to be a hit. So, roll up your sleeves, gather your ingredients, and let the magic happen in your kitchen. Trust me, you’ll be glad you did!
PrintVampire Bite Brownies: A Spooky Treat to Savor!
Vampire Bite Brownies are a deliciously spooky dessert perfect for Halloween or any themed party, featuring a rich chocolate brownie base topped with a gooey raspberry filling that resembles blood.
- Prep Time: 20 minutes
- Cook Time: 35 minutes
- Total Time: 55 minutes
- Yield: 24 brownies 1x
- Category: Dessert
- Method: Baking
- Cuisine: American
- Diet: Vegetarian
Ingredients
- 1 cup unsalted butter
- 2 cups granulated sugar
- 4 large eggs
- 1 teaspoon vanilla extract
- 1 cup all-purpose flour
- 1 cup unsweetened cocoa powder
- 1/2 teaspoon salt
- 1 cup raspberry jam
- Red food coloring (optional)
Instructions
- Preheat the oven to 350°F (175°C) and grease a 9×13 inch baking pan.
- In a large bowl, melt the butter and mix in the sugar until well combined.
- Add the eggs one at a time, mixing well after each addition, then stir in the vanilla extract.
- In another bowl, whisk together the flour, cocoa powder, and salt.
- Gradually add the dry ingredients to the wet ingredients, mixing until just combined.
- Pour half of the brownie batter into the prepared pan and spread evenly.
- Drop spoonfuls of raspberry jam over the brownie layer, then swirl it slightly with a knife.
- Pour the remaining brownie batter over the jam layer and spread evenly.
- Bake for 30-35 minutes or until a toothpick inserted in the center comes out with a few moist crumbs.
- Let cool before cutting into squares and serving.
Notes
- For a more intense ‘blood’ effect, mix red food coloring into the raspberry jam.
- These brownies can be stored in an airtight container for up to a week.
- Serve with a scoop of vanilla ice cream for an extra treat!
Nutrition
- Serving Size: 1 brownie
- Calories: 200
- Sugar: 18g
- Sodium: 150mg
- Fat: 10g
- Saturated Fat: 6g
- Unsaturated Fat: 4g
- Trans Fat: 0g
- Carbohydrates: 25g
- Fiber: 2g
- Protein: 3g
- Cholesterol: 50mg