
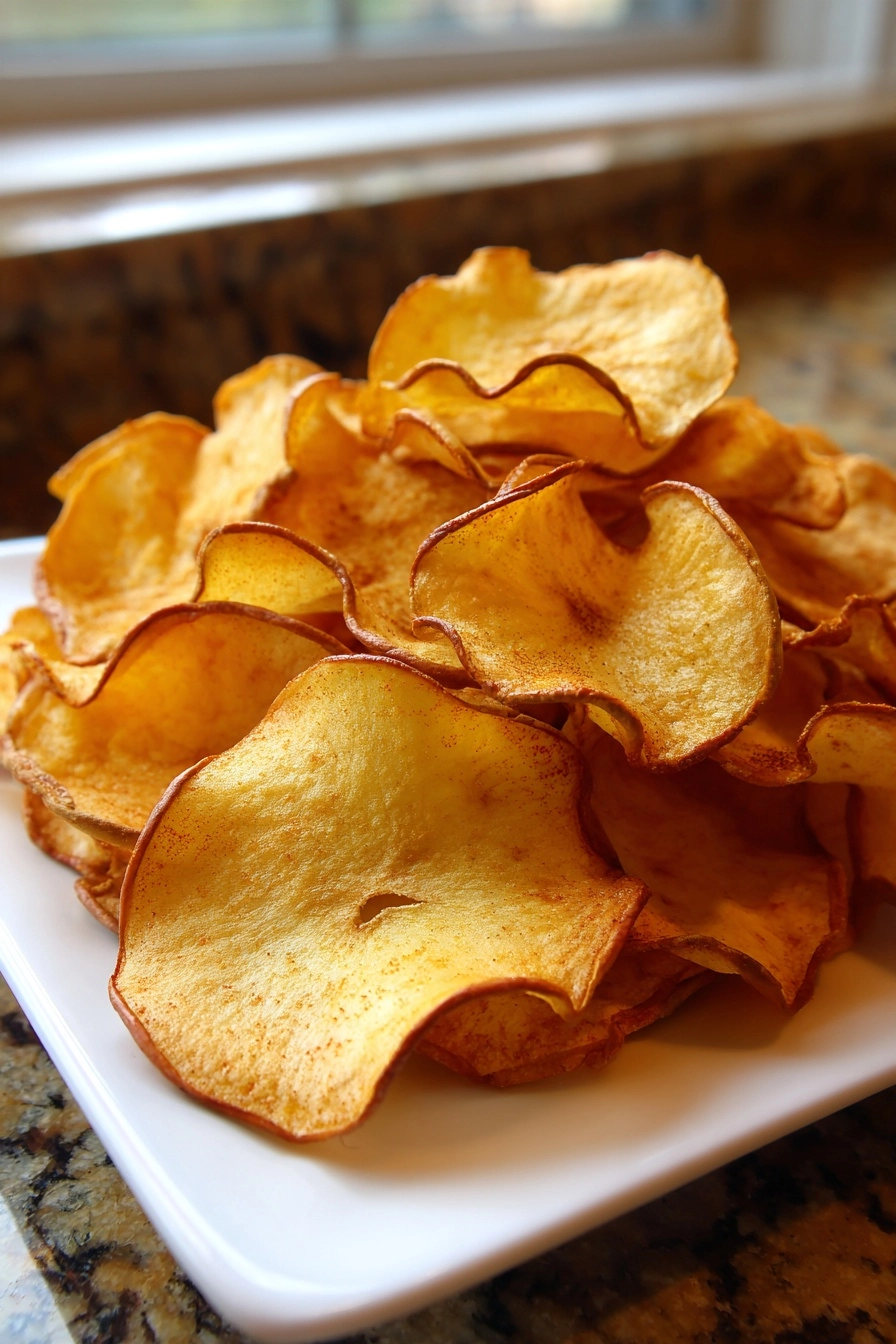
Gluten-Free Baked Apple Chips
As a busy mom, I know how challenging it can be to find healthy snacks that everyone loves. That’s why I’m excited to share my recipe for gluten-free baked apple chips! These crispy delights are not only easy to make but also a fantastic way to satisfy those afternoon cravings. With just a few simple ingredients, you can whip up a batch that’s perfect for sharing with family or enjoying solo. Trust me, once you try these, they’ll become a go-to snack in your home!
Why You’ll Love This Gluten-Free Baked Apple Chips
These gluten-free baked apple chips are a game-changer for busy days! They’re quick to prepare, taking just 15 minutes of your time, and the oven does the rest. The sweet, cinnamon-kissed flavor is irresistible, making them a hit with kids and adults alike. Plus, they’re a guilt-free snack that you can feel good about serving. Who knew healthy could taste this good?
Ingredients for Gluten-Free Baked Apple Chips
To create these delightful gluten-free baked apple chips, you’ll need just a handful of ingredients. Here’s what you’ll gather:
- Apples: Choose your favorite variety! Sweet apples like Fuji or Honeycrisp work wonders, while tart ones like Granny Smith add a nice zing.
- Cinnamon: This warm spice not only enhances the flavor but also brings a cozy aroma to your kitchen. Feel free to adjust the amount to suit your taste!
- Lemon Juice: A splash of lemon juice helps prevent the apples from browning and adds a refreshing tang that balances the sweetness.
For those looking to mix things up, consider adding a pinch of nutmeg or a drizzle of honey for extra flavor. You can also experiment with different apple varieties for unique tastes. Remember, the exact quantities are listed at the bottom of the article for easy printing!
How to Make Gluten-Free Baked Apple Chips
Making gluten-free baked apple chips is a breeze! Follow these simple steps, and you’ll have a delicious snack ready in no time. Let’s dive in!
Step 1: Preheat the Oven
First things first, preheat your oven to 200°F (93°C). Preheating is crucial because it ensures even cooking. If the oven isn’t hot enough, your apple chips may turn out chewy instead of crispy. Trust me, we want that satisfying crunch!
Step 2: Prepare the Apples
Next, it’s time to prepare the apples. Start by coring them to remove the seeds. Then, slice them thinly—about 1/8 inch thick. The thinner the slices, the crispier they’ll be. A mandoline slicer can be a handy tool here, but a sharp knife works just as well. Just be careful with those fingers!
Step 3: Season the Apple Slices
Now, let’s add some flavor! In a bowl, toss the apple slices with lemon juice and cinnamon. The lemon juice not only adds a zesty kick but also prevents the apples from browning. Cinnamon, on the other hand, brings warmth and sweetness. Feel free to adjust the cinnamon to your liking—more spice, more fun!
Step 4: Arrange on Baking Sheet
Time to arrange those apple slices! Line a baking sheet with parchment paper for easy cleanup. Lay the apple slices in a single layer, making sure they don’t overlap. This allows the hot air to circulate around each slice, ensuring they bake evenly and become perfectly crispy.
Step 5: Bake to Perfection
Pop the baking sheet into the oven and let the magic happen! Bake for 1 to 2 hours, flipping the slices halfway through. Keep an eye on them as they bake. You want them to be dry and crispy, not burnt. When they’re done, they should feel light and crunchy to the touch.
Step 6: Cool and Serve
Once your apple chips are baked to perfection, remove them from the oven and let them cool on the baking sheet. This cooling time is essential; it helps them crisp up even more. Once cooled, store them in an airtight container. They’ll stay fresh for up to a week—if they last that long!
Tips for Success
- Use a mandoline slicer for even apple slices.
- Experiment with different apple varieties for unique flavors.
- Check for doneness by tasting a slice; it should be crispy.
- Store in an airtight container to maintain crispiness.
- Adjust cinnamon and lemon juice to suit your taste preferences.
Equipment Needed
- Baking Sheet: A standard baking sheet works well, but a cooling rack can help with airflow.
- Parchment Paper: This makes cleanup a breeze; aluminum foil is a good alternative.
- Mandoline Slicer or Sharp Knife: A mandoline ensures even slices, but a sharp knife will do the trick.
- Mixing Bowl: Any bowl will work for tossing the apple slices with lemon juice and cinnamon.
Variations of Gluten-Free Baked Apple Chips
- Spiced Apple Chips: Add a pinch of nutmeg or allspice for a warm, festive flavor.
- Sweet and Salty: Sprinkle a touch of sea salt on the apple slices before baking for a delightful contrast.
- Maple Glazed: Drizzle a little maple syrup over the apple slices for a sweet twist.
- Chocolate-Dipped: Once cooled, dip half of each chip in melted dark chocolate for a decadent treat.
- Fruit Medley: Mix in other fruits like pears or peaches for a colorful and flavorful variety.
Serving Suggestions for Gluten-Free Baked Apple Chips
- Pair with a creamy yogurt dip for a delightful contrast.
- Serve alongside a cheese platter for a sweet and savory combo.
- Enjoy with a warm cup of herbal tea for a cozy snack.
- Present in a colorful bowl for a fun party treat.
- Sprinkle with chopped nuts for added crunch and nutrition.
FAQs about Gluten-Free Baked Apple Chips
As you embark on your journey to make gluten-free baked apple chips, you might have a few questions. Here are some common queries I’ve encountered, along with helpful answers!
Can I use any type of apple for this recipe?
Absolutely! Different apple varieties bring unique flavors. Sweet apples like Fuji or Honeycrisp are fantastic, while tart ones like Granny Smith add a nice zing. Feel free to experiment!
How do I store my apple chips?
Store your gluten-free baked apple chips in an airtight container. They’ll stay fresh and crispy for up to a week. Just make sure they’re completely cool before sealing them up!
Can I make these apple chips in a dehydrator?
Yes, you can! If you have a dehydrator, it’s a great alternative. Just follow the manufacturer’s instructions for drying fruits, and you’ll have delicious apple chips in no time.
What can I do if my apple chips aren’t crispy enough?
If your apple chips aren’t crispy, they may need more baking time. Just pop them back in the oven and check every 10 minutes until they reach that perfect crunch!
Can I add other spices to the apple chips?
Definitely! Feel free to get creative. Adding spices like nutmeg, ginger, or even a dash of cayenne can elevate the flavor profile of your gluten-free baked apple chips.
Summarizing the Joy of Gluten-Free Baked Apple Chips
There’s something truly special about making gluten-free baked apple chips. The aroma of cinnamon wafting through your kitchen instantly brings warmth and comfort. Each crispy bite is a delightful reminder that healthy snacks can be both delicious and satisfying. Whether you’re sharing them with family during movie night or sneaking a few for yourself, these apple chips are sure to bring smiles all around. Plus, the joy of creating something wholesome from scratch is a reward in itself. So, roll up your sleeves and enjoy the simple pleasure of these tasty treats!
PrintGluten-Free Baked Apple Chips: Discover Our Easy Recipe!
A simple and healthy recipe for making gluten-free baked apple chips that are crispy and delicious.
- Prep Time: 15 minutes
- Cook Time: 2 hours
- Total Time: 2 hours 15 minutes
- Yield: 4 servings 1x
- Category: Snack
- Method: Baking
- Cuisine: American
- Diet: Gluten Free
Ingredients
- 4 medium apples
- 1 teaspoon cinnamon
- 1 tablespoon lemon juice
Instructions
- Preheat the oven to 200°F (93°C).
- Core and thinly slice the apples.
- In a bowl, toss the apple slices with lemon juice and cinnamon.
- Arrange the apple slices in a single layer on a baking sheet lined with parchment paper.
- Bake for 1-2 hours, flipping halfway through, until the apples are dry and crispy.
- Let cool before serving.
Notes
- Store in an airtight container for up to a week.
- Adjust the cinnamon to taste.
- Try using different apple varieties for varied flavors.
Nutrition
- Serving Size: 1 serving
- Calories: 100
- Sugar: 15g
- Sodium: 1mg
- Fat: 0g
- Saturated Fat: 0g
- Unsaturated Fat: 0g
- Trans Fat: 0g
- Carbohydrates: 27g
- Fiber: 4g
- Protein: 0g
- Cholesterol: 0mg