
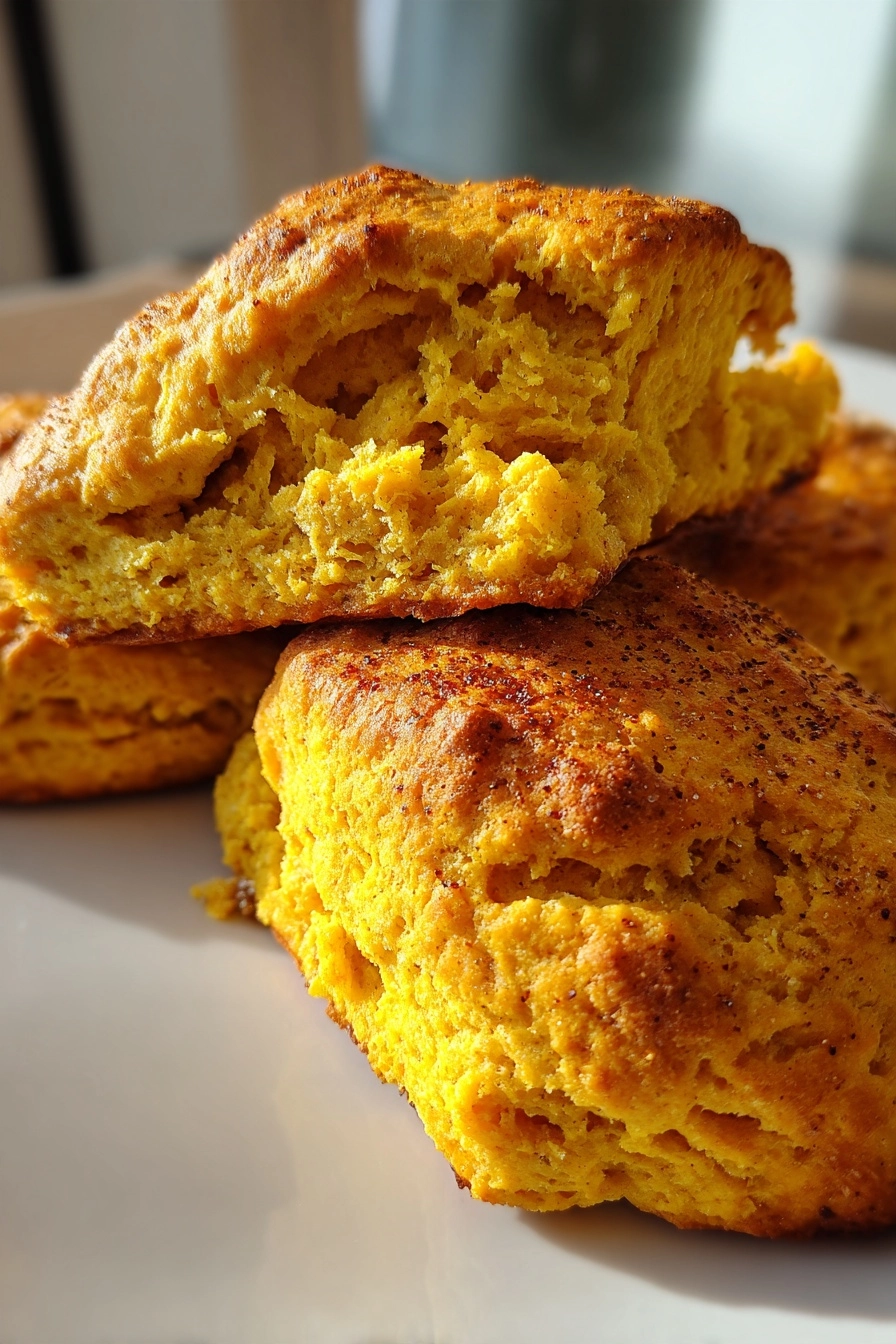
Gluten-Free Pumpkin Scones
As the leaves turn and the air gets crisp, I find myself craving the warm, cozy flavors of fall. These Gluten-Free Pumpkin Scones are my go-to treat, perfect for busy mornings or a delightful afternoon snack. They’re not just easy to whip up; they also fill your kitchen with the comforting aroma of cinnamon and nutmeg. Whether you’re a busy mom juggling work and family or a professional looking for a quick pick-me-up, these scones are a delicious solution. Trust me, your loved ones will be impressed, and you’ll feel like a kitchen superstar!
Why You’ll Love This Gluten-Free Pumpkin Scones
These Gluten-Free Pumpkin Scones are a dream come true for anyone short on time but big on flavor. They come together in just 35 minutes, making them perfect for busy mornings or last-minute gatherings. The delightful blend of pumpkin and spices creates a taste that’s both comforting and festive. Plus, they’re gluten-free, so everyone can enjoy them without worry. What’s not to love?
Ingredients for Gluten-Free Pumpkin Scones
Gathering the right ingredients is the first step to creating these delightful Gluten-Free Pumpkin Scones. Here’s what you’ll need:
- Gluten-free all-purpose flour: This is the base of your scones, providing structure without the gluten. Look for a blend that includes xanthan gum for the best results.
- Pumpkin puree: The star of the show! It adds moisture and that lovely pumpkin flavor. Canned pumpkin works great, but feel free to use homemade if you have it.
- Sugar: A touch of sweetness to balance the spices. You can use regular granulated sugar or opt for coconut sugar for a healthier twist.
- Brown sugar: This adds a hint of caramel flavor and moisture, making your scones extra tender.
- Baking soda: This helps the scones rise, giving them that light and fluffy texture.
- Baking powder: Another leavening agent that works alongside baking soda for perfect scones.
- Cinnamon: A warm spice that brings a cozy aroma and flavor, making these scones feel like a hug in pastry form.
- Nutmeg: Just a pinch adds depth and enhances the fall flavors. Freshly grated nutmeg is a lovely touch if you have it!
- Salt: A little salt enhances all the flavors, balancing the sweetness and spices.
- Cold butter: This is crucial for creating flaky layers. Make sure it’s cold and cubed for the best texture.
- Milk: You can use regular milk or a dairy-free alternative like almond or oat milk, depending on your dietary needs.
- Vanilla extract: A splash of vanilla adds a lovely depth of flavor that complements the pumpkin beautifully.
For those who like to experiment, consider adding chocolate chips or nuts for an extra crunch. You can find the exact measurements for these ingredients at the bottom of the article, ready for printing!
How to Make Gluten-Free Pumpkin Scones
Step 1: Preheat the Oven
Start by preheating your oven to 400°F (200°C). This step is crucial because it ensures even baking. While the oven heats, line a baking sheet with parchment paper. This will prevent the scones from sticking and make cleanup a breeze!
Step 2: Mix Dry Ingredients
In a large bowl, whisk together the gluten-free flour, baking powder, baking soda, cinnamon, nutmeg, and salt. This step is vital as it evenly distributes the leavening agents and spices. A well-mixed dry blend sets the stage for perfectly fluffy Gluten-Free Pumpkin Scones.
Step 3: Incorporate Butter
Add the cold, cubed butter to the dry mixture. Using a pastry cutter or your fingers, mix until the texture resembles coarse crumbs. This is key for achieving those flaky layers we all love in scones. Don’t overmix; you want to see small bits of butter!
Step 4: Add Wet Ingredients
Now, stir in the pumpkin puree, milk, and vanilla extract. Mix gently until just combined. Overmixing can lead to tough scones, and we want them light and tender. The pumpkin adds moisture and flavor, making these scones irresistible!
Step 5: Knead the Dough
Turn the dough onto a floured surface and gently knead it a few times. This helps bring everything together without overworking the dough. Remember, we’re aiming for tender scones, not tough ones. Just a few gentle folds will do!
Step 6: Shape and Cut
Pat the dough into a circle about 1 inch thick. Use a sharp knife or a pizza cutter to slice it into wedges. This is where the magic happens! Each wedge will puff up beautifully in the oven, creating those lovely scone shapes.
Step 7: Bake the Scones
Place the scones on your prepared baking sheet and bake for 15-20 minutes. Keep an eye on them; they should turn golden brown. To check for doneness, insert a toothpick in the center. If it comes out clean, your Gluten-Free Pumpkin Scones are ready!
Tips for Success
- Use cold butter for flaky scones; it makes all the difference!
- Don’t overmix the dough; gentle handling keeps them tender.
- Experiment with spices; a dash of ginger or cloves can elevate the flavor.
- For a golden finish, brush the tops with milk before baking.
- Store leftovers in an airtight container to maintain freshness.
Equipment Needed
- Mixing bowl: A large bowl for combining ingredients. A sturdy glass or ceramic bowl works well.
- Whisk: For mixing dry ingredients. A fork can also do the trick in a pinch.
- Pastry cutter: Ideal for incorporating butter. You can use your fingers if you don’t have one.
- Baking sheet: A standard baking sheet lined with parchment paper ensures easy cleanup.
- Knife or pizza cutter: For cutting the dough into wedges. A sharp knife is perfect for clean cuts.
Variations
- Chocolate Chip Scones: Add a handful of chocolate chips for a sweet twist that chocolate lovers will adore.
- Nuts and Seeds: Incorporate chopped walnuts or pecans for added crunch and nutrition.
- Spiced Scones: Experiment with additional spices like ginger or cloves for a more complex flavor profile.
- Dairy-Free Option: Use coconut oil instead of butter and a dairy-free milk alternative for a completely dairy-free treat.
- Gluten-Free Flour Blend: Try different gluten-free flour blends to find your favorite texture and taste.
Serving Suggestions
- Pair with Coffee or Tea: These scones are delightful with a warm cup of coffee or your favorite herbal tea.
- Spread with Butter: A pat of butter or a drizzle of honey enhances the flavors beautifully.
- Serve with Whipped Cream: Top with a dollop of whipped cream for a decadent treat.
- Presentation: Arrange on a rustic platter for a charming display at gatherings.
FAQs about Gluten-Free Pumpkin Scones
Can I make these scones ahead of time? Absolutely! You can prepare the dough and refrigerate it for up to 24 hours before baking. Just remember to let it sit at room temperature for a few minutes before shaping.
What can I substitute for gluten-free flour? If you don’t have gluten-free all-purpose flour, you can use a homemade blend of almond flour and coconut flour. Just keep in mind that the texture may vary slightly.
How do I store leftover scones? Store your Gluten-Free Pumpkin Scones in an airtight container at room temperature for up to three days. For longer storage, freeze them for up to two months.
Can I add other flavors to the scones? Yes! Feel free to experiment with different spices or add-ins like chocolate chips, nuts, or dried fruit to customize your scones.
Are these scones suitable for a gluten-free diet? Yes! These scones are specifically made to be gluten-free, making them a safe and delicious option for anyone avoiding gluten.
Summarizing the Joy of Gluten-Free Pumpkin Scones
There’s something truly magical about baking these Gluten-Free Pumpkin Scones. The process fills your home with warmth and the sweet, spicy aroma of fall. Each bite is a delightful blend of flavors, bringing comfort and joy to your day. Whether you’re sharing them with family or savoring one with your morning coffee, these scones create moments of happiness. They’re not just a treat; they’re a celebration of the season and a reminder that delicious, gluten-free options can be easy and satisfying. So, roll up your sleeves and enjoy the joy of baking!
PrintGluten-Free Pumpkin Scones: Deliciously Easy Recipe!

These Gluten-Free Pumpkin Scones are a delicious and easy treat, perfect for fall or any time of year.
- Prep Time: 15 minutes
- Cook Time: 20 minutes
- Total Time: 35 minutes
- Yield: 8 scones 1x
- Category: Baked Goods
- Method: Baking
- Cuisine: American
- Diet: Gluten Free
Ingredients
- 2 cups gluten-free all-purpose flour
- 1/2 cup pumpkin puree
- 1/4 cup sugar
- 1/4 cup brown sugar
- 1/2 teaspoon baking soda
- 1 tablespoon baking powder
- 1 teaspoon cinnamon
- 1/2 teaspoon nutmeg
- 1/4 teaspoon salt
- 1/2 cup cold butter, cubed
- 1/2 cup milk (or dairy-free alternative)
- 1 teaspoon vanilla extract
Instructions
- Preheat the oven to 400°F (200°C) and line a baking sheet with parchment paper.
- In a large bowl, whisk together the gluten-free flour, baking powder, baking soda, cinnamon, nutmeg, and salt.
- Add the cold butter and mix until the mixture resembles coarse crumbs.
- Stir in the pumpkin puree, milk, and vanilla extract until just combined.
- Turn the dough onto a floured surface and gently knead it a few times.
- Pat the dough into a circle about 1 inch thick and cut into wedges.
- Place the scones on the prepared baking sheet and bake for 15-20 minutes or until golden brown.
- Let cool slightly before serving.
Notes
- For added flavor, consider adding chocolate chips or nuts.
- Store leftovers in an airtight container for up to 3 days.
- These scones can be frozen for up to 2 months.
Nutrition
- Serving Size: 1 scone
- Calories: 180
- Sugar: 10g
- Sodium: 150mg
- Fat: 8g
- Saturated Fat: 5g
- Unsaturated Fat: 3g
- Trans Fat: 0g
- Carbohydrates: 24g
- Fiber: 2g
- Protein: 3g
- Cholesterol: 20mg