
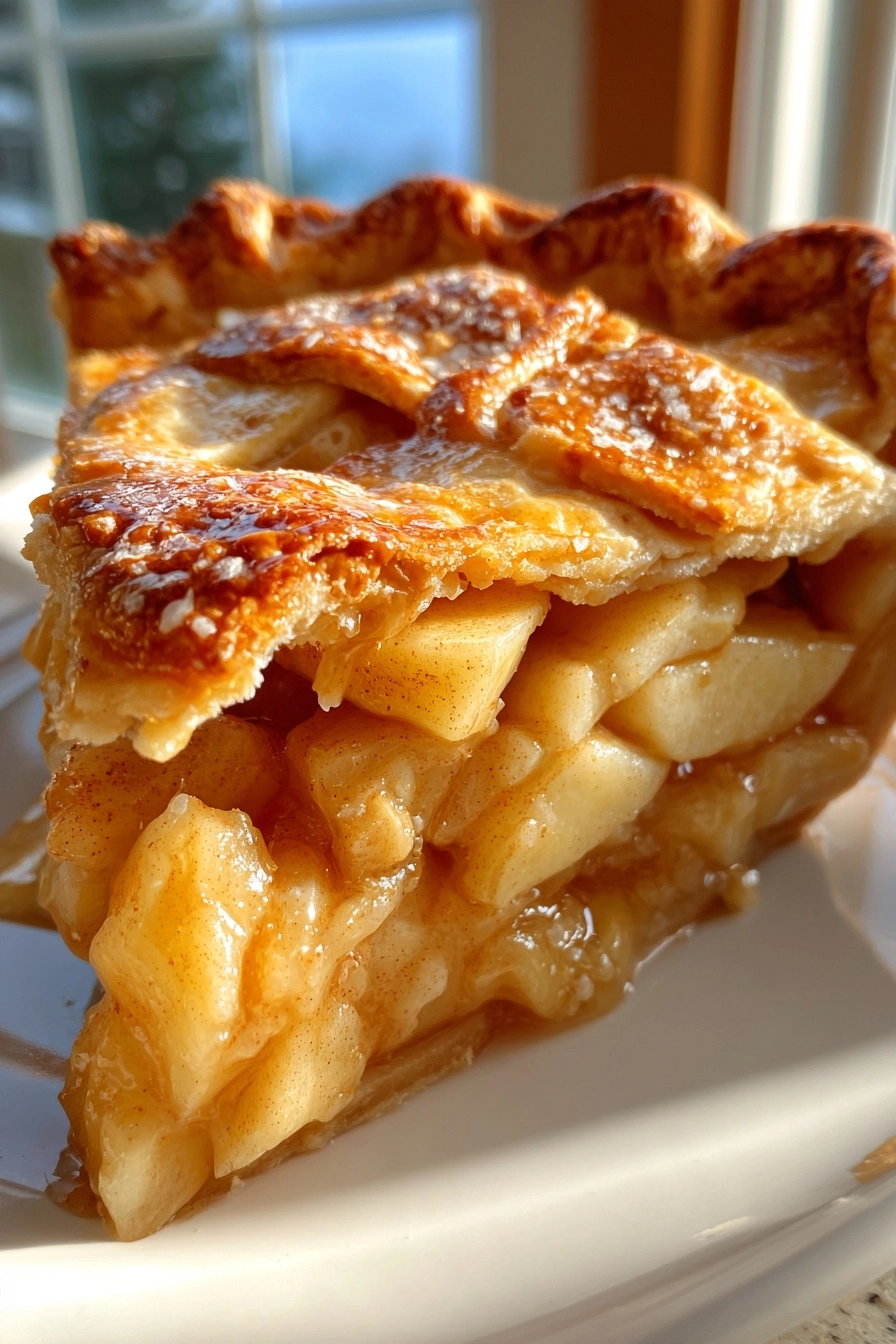
Gluten Free Apple Pie Bars
As a busy mom, I know how precious time can be, especially when it comes to whipping up something delicious. That’s why I adore these gluten free apple pie bars! They’re not just a treat; they’re a quick solution for those hectic days when you want to impress your loved ones without spending hours in the kitchen. Imagine the warm aroma of cinnamon and baked apples wafting through your home, inviting everyone to gather around. These bars are perfect for any occasion, whether it’s a family gathering or a cozy night in. Trust me, they’ll become a favorite!
Why You’ll Love This Gluten Free Apple Pie Bars
These gluten free apple pie bars are a delightful blend of ease and flavor. They come together quickly, making them perfect for busy days when you crave something sweet. The taste? Oh, it’s like a warm hug on a chilly evening! With a buttery crust and a spiced apple filling, these bars are sure to please everyone, even those who aren’t gluten-free. You’ll love how simple they are to make!
Ingredients for Gluten Free Apple Pie Bars
Gathering the right ingredients is the first step to creating these delightful gluten free apple pie bars. Here’s what you’ll need:
- Gluten-free all-purpose flour: This is the base of your crust. It gives structure without the gluten, making it perfect for everyone.
- Unsalted butter: Softened butter adds richness and flavor to the crust. You can substitute with coconut oil for a dairy-free option.
- Brown sugar: This adds a lovely caramel flavor to the crust. If you prefer, you can use coconut sugar for a healthier twist.
- Granulated sugar: A touch of sweetness balances the flavors. Feel free to adjust based on your taste.
- Salt: Just a pinch enhances all the flavors. It’s a must-have in any baking recipe!
- Cinnamon: This warm spice is essential for that classic apple pie flavor. You can also add a dash of allspice for extra warmth.
- Nutmeg: A little goes a long way! It complements the apples beautifully.
- Cold water: This helps bring the dough together. Make sure it’s cold to keep the butter from melting.
- Apples: Use your favorite variety! Granny Smith or Honeycrisp work wonderfully for their balance of tartness and sweetness.
- Lemon juice: This brightens the apple filling and prevents browning. Freshly squeezed is best!
- Cornstarch: This thickens the apple filling, ensuring it’s not too runny.
For exact measurements, check the bottom of the article where you can find everything listed for easy printing. Happy baking!
How to Make Gluten Free Apple Pie Bars
Now that you have your ingredients ready, let’s dive into the fun part—making these scrumptious gluten free apple pie bars! Follow these simple steps, and you’ll have a delightful dessert that everyone will love.
Step 1: Preheat the Oven
First things first, preheat your oven to 350°F (175°C). Preheating is crucial because it ensures even baking. You want that perfect golden crust, right? So, let your oven warm up while you prepare the rest of the ingredients.
Step 2: Prepare the Crust Mixture
In a large bowl, combine the gluten-free flour, softened butter, brown sugar, granulated sugar, salt, cinnamon, and nutmeg. Mix them together until the mixture resembles coarse crumbs. This step is key for a flaky crust. You can use a pastry cutter or your fingers to achieve that crumbly texture.
Step 3: Form the Dough
Next, gradually add cold water to the mixture. Stir until the dough comes together. It should be moist but not sticky. If it feels too dry, add a tiny bit more water. The dough is ready when it holds together without crumbling apart.
Step 4: Press the Dough into the Baking Dish
Now, take half of the dough and press it evenly into the bottom of a greased baking dish. Use your fingers or the back of a measuring cup to spread it out. Make sure it’s packed tightly, so it holds up during baking. This will be the base for your delicious apple filling!
Step 5: Prepare the Apple Filling
In another bowl, toss the sliced apples with lemon juice and cornstarch. The lemon juice brightens the flavor and keeps the apples from browning. Cornstarch thickens the filling, preventing it from becoming too runny. Mix well to coat all the apple slices.
Step 6: Assemble the Bars
Spread the apple mixture evenly over the crust in the baking dish. Then, crumble the remaining dough over the top of the apples. This creates a lovely, crunchy topping that contrasts beautifully with the soft apples. Don’t worry about making it perfect; a rustic look adds charm!
Step 7: Bake to Perfection
Place the baking dish in the preheated oven and bake for 30-35 minutes. Keep an eye on it! You want the top to be golden brown and the apples to be bubbly. To check for doneness, insert a toothpick into the center; it should come out clean.
Step 8: Cool and Slice
Once baked, remove the dish from the oven and let it cool for at least 15 minutes. This cooling time is essential for the bars to set properly. If you slice them too soon, they might fall apart. After cooling, cut into bars and enjoy the delightful flavors!
Tips for Success
- Use a mix of sweet and tart apples for a balanced flavor.
- Chill your butter before mixing for a flakier crust.
- Don’t skip the cooling time; it helps the bars hold their shape.
- For extra flavor, sprinkle some oats on top of the crumble.
- Store leftovers in an airtight container to keep them fresh.
Equipment Needed
- Mixing bowls: Any size will do, but a large one is best for combining ingredients.
- Baking dish: A 9×13 inch dish works perfectly; you can also use a glass or ceramic one.
- Measuring cups and spoons: Essential for accuracy in baking.
- Pastry cutter or fork: Great for mixing the dough, but your hands work too!
- Spatula: Useful for spreading the dough and apple filling evenly.
Variations
- For a nutty twist, add chopped walnuts or pecans to the apple filling.
- Try using different spices like ginger or cardamom for a unique flavor profile.
- Substitute the apples with pears or peaches for a seasonal variation.
- Make it vegan by replacing the butter with coconut oil and using a flax egg.
- Add a drizzle of caramel sauce on top for an indulgent treat!
Serving Suggestions
- Serve warm with a scoop of vanilla ice cream for a delightful contrast.
- Pair with a dollop of whipped cream for an extra touch of sweetness.
- Drizzle with caramel sauce for a decadent finish.
- Enjoy with a cup of hot tea or coffee for a cozy treat.
- Garnish with a sprinkle of cinnamon for a beautiful presentation.
FAQs about Gluten Free Apple Pie Bars
As you embark on your baking adventure with these gluten free apple pie bars, you might have a few questions. Here are some common queries that I’ve encountered, along with helpful answers to guide you along the way.
Can I use regular flour instead of gluten-free flour?
While I love the texture of gluten free flour in these bars, you can use regular all-purpose flour if gluten isn’t a concern for you. Just keep in mind that the texture may differ slightly.
How do I store leftover apple pie bars?
Store any leftovers in an airtight container in the refrigerator. They’ll stay fresh for about 3-4 days. Just reheat them in the microwave for a few seconds before enjoying!
Can I freeze these gluten free apple pie bars?
Absolutely! These bars freeze beautifully. Just wrap them tightly in plastic wrap and then place them in a freezer-safe container. They can last up to three months in the freezer.
What type of apples work best for this recipe?
I recommend using a mix of sweet and tart apples, like Granny Smith and Honeycrisp. This combination gives the filling a delightful balance of flavors that everyone will love!
Can I make these bars vegan?
Yes! You can easily make these gluten free apple pie bars vegan by substituting the butter with coconut oil and using a flax egg instead. They’ll still be delicious!
Summarizing the Joy of Gluten Free Apple Pie Bars
There’s something truly magical about baking gluten free apple pie bars. The process brings the family together, filling the kitchen with warmth and laughter. Each bite is a delightful blend of sweet and spiced apples, nestled in a buttery crust that melts in your mouth. Whether you’re sharing them at a gathering or enjoying a quiet moment with a cup of tea, these bars create memories that linger long after the last crumb is gone. So, roll up your sleeves, embrace the joy of baking, and let these bars become a cherished part of your family’s dessert tradition!
PrintGluten Free Apple Pie Bars That Everyone Will Love!
Delicious gluten-free apple pie bars that are easy to make and perfect for any occasion.
- Prep Time: 20 minutes
- Cook Time: 35 minutes
- Total Time: 55 minutes
- Yield: 12 bars 1x
- Category: Dessert
- Method: Baking
- Cuisine: American
- Diet: Gluten Free
Ingredients
- 2 cups gluten-free all-purpose flour
- 1/2 cup unsalted butter, softened
- 1/2 cup brown sugar
- 1/4 cup granulated sugar
- 1/2 teaspoon salt
- 1 teaspoon cinnamon
- 1/4 teaspoon nutmeg
- 1/4 cup cold water
- 3 cups apples, peeled and sliced
- 1 tablespoon lemon juice
- 1 tablespoon cornstarch
Instructions
- Preheat the oven to 350°F (175°C).
- In a bowl, mix the gluten-free flour, butter, brown sugar, granulated sugar, salt, cinnamon, and nutmeg until crumbly.
- Add cold water gradually until the mixture forms a dough.
- Press half of the dough into the bottom of a greased baking dish.
- In another bowl, combine sliced apples, lemon juice, and cornstarch.
- Spread the apple mixture over the crust in the baking dish.
- Crumble the remaining dough over the apple filling.
- Bake for 30-35 minutes or until the top is golden brown.
- Let cool before slicing into bars.
Notes
- For a sweeter filling, add more sugar to the apples.
- Serve with vanilla ice cream for an extra treat.
- Store leftovers in an airtight container in the refrigerator.
Nutrition
- Serving Size: 1 bar
- Calories: 180
- Sugar: 12g
- Sodium: 150mg
- Fat: 7g
- Saturated Fat: 4g
- Unsaturated Fat: 2g
- Trans Fat: 0g
- Carbohydrates: 25g
- Fiber: 2g
- Protein: 2g
- Cholesterol: 20mg