
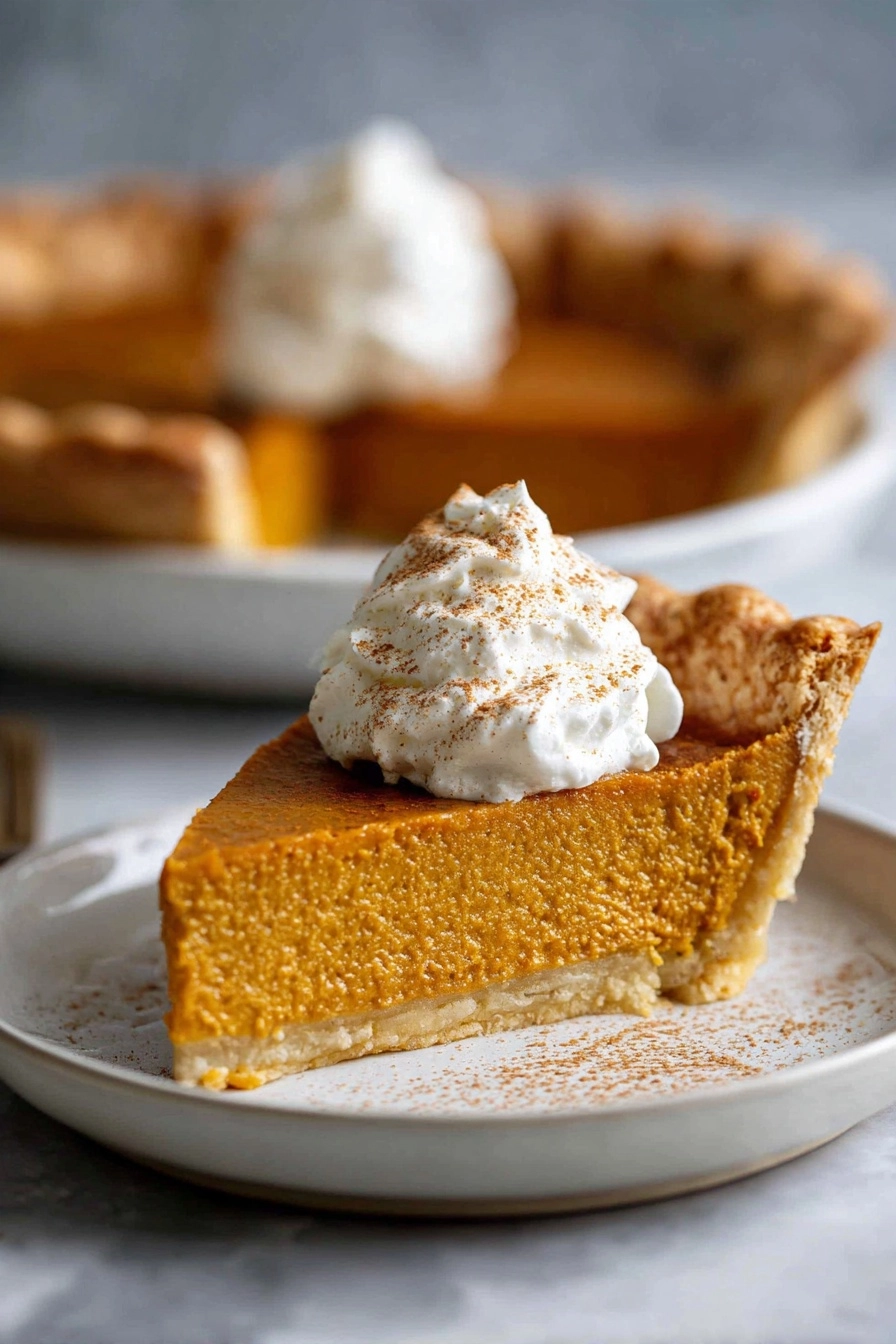
Gluten Free Pumpkin Pie Bars
As the leaves turn and the air gets crisp, I find myself craving the warm, comforting flavors of fall. These gluten free pumpkin pie bars are my go-to treat for busy days when I want to whip up something special without spending hours in the kitchen. They’re not just a dessert; they’re a hug in bar form! Perfect for family gatherings or a cozy night in, these bars will impress your loved ones and satisfy your sweet tooth. Trust me, once you try them, you’ll be making them all season long!
Why You’ll Love This Gluten Free Pumpkin Pie Bars
These gluten free pumpkin pie bars are a delightful blend of ease and flavor. With just a handful of ingredients, you can create a dessert that tastes like a warm embrace. They bake up quickly, making them perfect for those hectic days when time is short. Plus, the rich pumpkin flavor paired with warm spices will have everyone asking for seconds. Trust me, they’re a fall favorite!
Ingredients for Gluten Free Pumpkin Pie Bars
Gathering the right ingredients is the first step to creating these delicious gluten free pumpkin pie bars. Here’s what you’ll need:
- Gluten-free all-purpose flour: This is the base of your crust, providing structure without the gluten. Look for a blend that includes xanthan gum for the best results.
- Brown sugar: Adds a rich, caramel-like sweetness to the crust. You can substitute with coconut sugar for a healthier option.
- Melted butter: This brings moisture and flavor to the crust. If you prefer a dairy-free version, coconut oil works beautifully.
- Pumpkin puree: The star of the show! Use canned pumpkin for convenience, or roast your own for a fresher taste.
- Coconut milk: This creamy ingredient adds richness to the filling. Almond milk can be a lighter alternative if you’re looking for a different flavor.
- Sugar: Regular granulated sugar sweetens the filling. You can reduce the amount if you prefer a less sweet dessert.
- Eggs: They help bind everything together and give the bars a lovely texture. For a vegan option, try flax eggs.
- Vanilla extract: A splash of this adds depth to the flavor. Always opt for pure vanilla for the best taste.
- Cinnamon, nutmeg, and ginger: These warm spices create that classic pumpkin pie flavor. Feel free to adjust the amounts to suit your taste.
- Salt: Just a pinch enhances all the flavors in your bars.
For exact measurements, check the bottom of the article where you can find everything listed for easy printing. Happy baking!
How to Make Gluten Free Pumpkin Pie Bars
Making these gluten free pumpkin pie bars is a breeze! Follow these simple steps, and you’ll have a delicious dessert ready in no time. Let’s dive in!
Step 1: Preheat the Oven
First things first, preheat your oven to 350°F (175°C). Preheating is crucial because it ensures even baking. If you skip this step, your bars might not set properly, and nobody wants a gooey mess!
Step 2: Prepare the Crust
In a mixing bowl, combine the gluten-free flour, brown sugar, and melted butter. Stir until the mixture resembles coarse crumbs. You want it to be crumbly but still hold together when pressed. This crust will be the perfect base for your pumpkin filling!
Step 3: Press the Mixture
Now, take that crumbly mixture and press it evenly into the bottom of a greased baking dish. Use your fingers or the back of a measuring cup to ensure it’s packed tightly. A well-pressed crust will give you a sturdy base for your gluten free pumpkin pie bars.
Step 4: Mix the Pumpkin Filling
In another bowl, combine the pumpkin puree, coconut milk, sugar, eggs, vanilla extract, cinnamon, nutmeg, ginger, and salt. Whisk until smooth and creamy. You want a velvety consistency that’s free of lumps. This filling is where all the magic happens!
Step 5: Pour and Bake
Carefully pour the pumpkin filling over the crust in your baking dish. Spread it out evenly with a spatula. Bake in the preheated oven for 30-35 minutes, or until the filling is set and a toothpick comes out clean. The aroma will fill your kitchen, making it hard to wait!
Step 6: Cool and Cut
Once baked, remove the dish from the oven and let it cool completely. This step is essential! If you cut the bars too soon, they might crumble. Once cooled, slice them into bars and store any leftovers in the refrigerator for up to five days. Enjoy your delicious gluten free pumpkin pie bars!
Tips for Success
- Always measure your ingredients accurately for the best results.
- Let the bars cool completely before cutting to avoid crumbling.
- Use a sharp knife for clean cuts; a warm knife works wonders!
- Experiment with spices to find your perfect flavor balance.
- Store leftovers in an airtight container to keep them fresh.
Equipment Needed
- Mixing bowls: Use any size you have on hand; a large bowl is great for mixing the filling.
- Measuring cups and spoons: Essential for accurate ingredient measurements; a kitchen scale can also work.
- Baking dish: A 9×13 inch dish is perfect; you can use a glass or metal one.
- Whisk: A simple whisk or fork will do for mixing the filling.
- Spatula: Great for spreading the filling and serving the bars.
Variations
- Nutty Twist: Add chopped pecans or walnuts to the crust for a delightful crunch.
- Chocolate Lovers: Swirl in some dairy-free chocolate chips into the pumpkin filling for a rich flavor.
- Spiced Up: Experiment with additional spices like cardamom or allspice for a unique twist on the classic flavor.
- Maple Sweetened: Substitute the sugar with pure maple syrup for a natural sweetness and a hint of maple flavor.
- Vegan Option: Replace eggs with flax eggs and use coconut oil instead of butter for a completely plant-based treat.
Serving Suggestions
- Serve warm with a dollop of whipped cream or coconut whipped cream for a delightful touch.
- Pair with a hot cup of spiced chai or apple cider for a cozy fall experience.
- Garnish with a sprinkle of cinnamon or a drizzle of caramel sauce for added flair.
- For a festive presentation, serve on a decorative platter with fresh fall fruits.
FAQs about Gluten Free Pumpkin Pie Bars
As I’ve shared my love for these gluten free pumpkin pie bars, I often get questions from fellow home cooks. Here are some of the most common inquiries I’ve encountered:
Can I use fresh pumpkin instead of canned?
Absolutely! Fresh pumpkin can add a lovely flavor. Just make sure to roast and puree it until smooth before using it in the recipe.
How do I store leftovers?
Store your gluten free pumpkin pie bars in an airtight container in the refrigerator. They’ll stay fresh for up to five days, making them a perfect treat for snacking!
Can I freeze these bars?
Yes, you can freeze them! Just wrap the bars tightly in plastic wrap and then place them in a freezer-safe container. They’ll keep well for up to three months.
What can I substitute for coconut milk?
If you’re not a fan of coconut milk, almond milk or oat milk can work as great alternatives. Just keep in mind that the flavor may vary slightly.
Are these bars suitable for a gluten-free diet?
Yes! As long as you use certified gluten-free ingredients, these gluten free pumpkin pie bars are perfect for anyone avoiding gluten.
Summarizing the Joy of Gluten Free Pumpkin Pie Bars
There’s something truly magical about these gluten free pumpkin pie bars. They capture the essence of fall in every bite, bringing warmth and comfort to your table. Whether you’re sharing them with family or enjoying a quiet moment with a cup of tea, these bars create memories that linger long after the last crumb is gone. The blend of spices and creamy pumpkin filling is a delightful reminder of cozy gatherings and festive celebrations. So, roll up your sleeves and embrace the joy of baking these bars; they’re sure to become a cherished tradition in your home!
PrintGluten Free Pumpkin Pie Bars: A Delicious Fall Treat!
Delicious gluten-free pumpkin pie bars that are perfect for fall.
- Prep Time: 15 minutes
- Cook Time: 35 minutes
- Total Time: 50 minutes
- Yield: 12 bars 1x
- Category: Dessert
- Method: Baking
- Cuisine: American
- Diet: Gluten Free
Ingredients
- 1 cup gluten-free all-purpose flour
- 1/2 cup brown sugar
- 1/4 cup melted butter
- 1 can (15 oz) pumpkin puree
- 1 cup coconut milk
- 3/4 cup sugar
- 3 large eggs
- 1 tsp vanilla extract
- 1 tsp cinnamon
- 1/2 tsp nutmeg
- 1/4 tsp ginger
- 1/4 tsp salt
Instructions
- Preheat the oven to 350°F (175°C).
- In a bowl, mix gluten-free flour, brown sugar, and melted butter until crumbly.
- Press the mixture into the bottom of a greased baking dish.
- In another bowl, combine pumpkin puree, coconut milk, sugar, eggs, vanilla, cinnamon, nutmeg, ginger, and salt.
- Pour the pumpkin mixture over the crust in the baking dish.
- Bake for 30-35 minutes or until set.
- Let cool before cutting into bars.
Notes
- Store leftovers in the refrigerator for up to 5 days.
- These bars can be served with whipped cream for added flavor.
- Make sure to use gluten-free certified ingredients.
Nutrition
- Serving Size: 1 bar
- Calories: 180
- Sugar: 12g
- Sodium: 150mg
- Fat: 8g
- Saturated Fat: 4g
- Unsaturated Fat: 3g
- Trans Fat: 0g
- Carbohydrates: 24g
- Fiber: 2g
- Protein: 3g
- Cholesterol: 50mg