
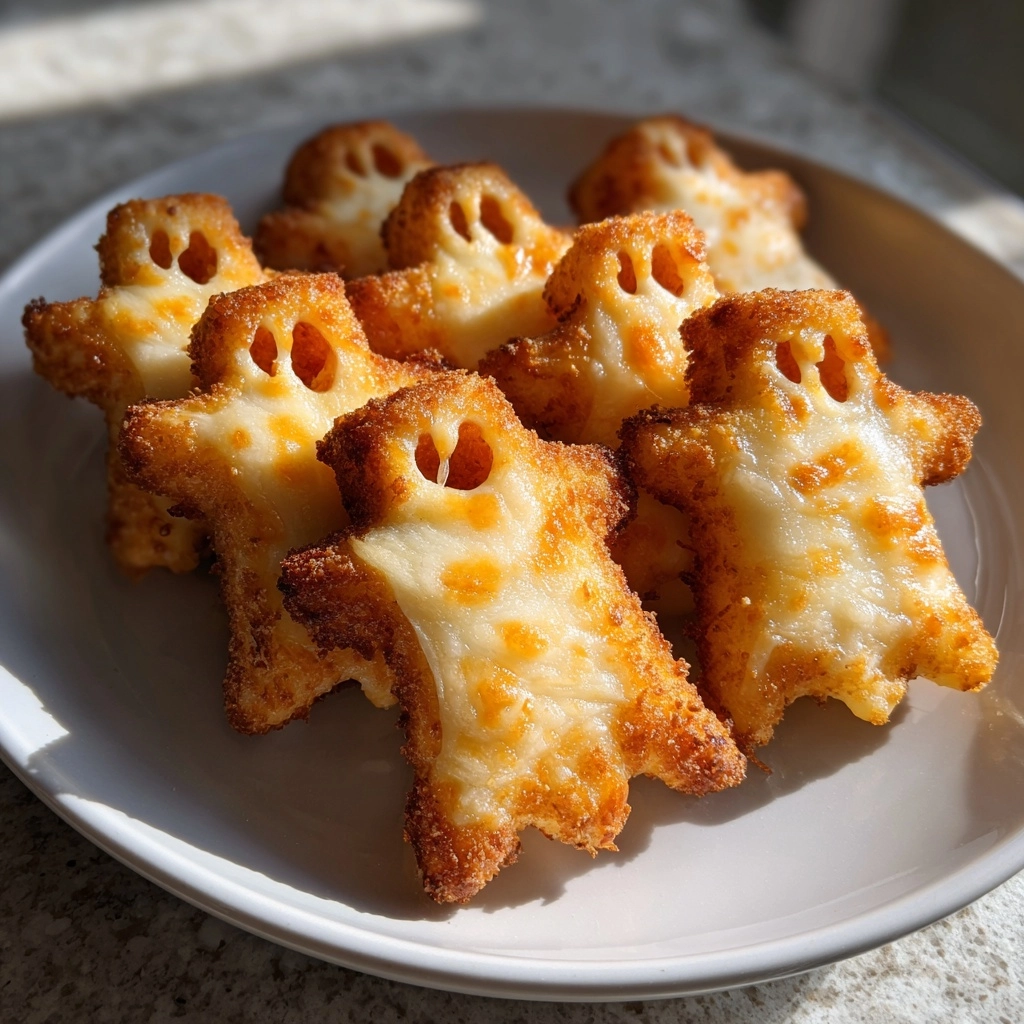
Introduction to Ghostly Cheese Sticks
As the leaves turn and the air gets crisp, I find myself craving fun and festive snacks. That’s where these Ghostly Cheese Sticks come in! They’re not just a treat; they’re a delightful way to bring a little Halloween magic into your home. Perfect for busy moms like me, this recipe is quick and easy, making it a fantastic solution for those hectic days. Plus, they’re sure to impress both kids and adults alike. So, let’s dive into this spooky snack that’s as fun to make as it is to eat!
Why You’ll Love This Ghostly Cheese Sticks
These Ghostly Cheese Sticks are a lifesaver for busy days! They come together in just 17 minutes, making them a perfect last-minute snack. The kids will love the spooky shapes, and you’ll appreciate how easy they are to whip up. Plus, they’re deliciously cheesy with a fun twist. It’s a win-win for everyone, and they’re sure to become a Halloween favorite in your household!
Ingredients for Ghostly Cheese Sticks
Gathering the right ingredients is half the fun! Here’s what you’ll need to create these delightful Ghostly Cheese Sticks:
- String cheese sticks: The star of the show! These provide the cheesy goodness and are easy to shape into ghosts.
- Black olives: Sliced olives make perfect spooky eyes. If you’re feeling adventurous, jalapeño slices can add a kick!
- Cream cheese: This creamy layer not only adds flavor but also helps the olives stick. It’s a great canvas for your ghostly creations.
- Edible googly eyes: For an extra touch of fun, these can be used instead of olives. They’ll make your cheese sticks even more whimsical!
For exact measurements, check the bottom of the article where you can find everything available for printing. Feel free to get creative with your ingredients! You can swap out the olives for other toppings or even add some herbs for a unique twist. The possibilities are endless!
How to Make Ghostly Cheese Sticks
Making these Ghostly Cheese Sticks is a breeze! Follow these simple steps, and you’ll have a spooky snack ready in no time. Let’s get started!
Step 1: Preheat the Oven
First things first, preheat your oven to 350°F (175°C). Preheating is crucial because it ensures even cooking. You want those cheese sticks to melt just right, creating that gooey, ghostly goodness!
Step 2: Prepare the Cheese Sticks
Next, unwrap the string cheese sticks and lay them out on a baking sheet. Make sure to give them some space. This way, they won’t stick together while baking. Trust me, you want each ghost to shine!
Step 3: Create Ghostly Shapes
Now comes the fun part! Using a knife, carefully cut the top of each cheese stick to form a ghostly shape. Think of it like giving your cheese a little haircut! The more whimsical the shape, the spookier the ghost!
Step 4: Add Cream Cheese
Spread a thin layer of cream cheese over each cheese stick. This not only adds flavor but also acts like glue for the toppings. Make sure to cover the cheese evenly, so every bite is deliciously creamy!
Step 5: Add Eyes
Time to give your ghosts some personality! Place two slices of black olives on each cheese stick to create spooky eyes. You can also use edible googly eyes for an extra fun touch. The kids will love it!
Step 6: Bake
Pop the baking sheet into the preheated oven and bake for 5-7 minutes. Keep an eye on them! You want the cheese to be slightly melted but not overdone. The goal is that perfect, ooey-gooey texture!
Step 7: Cool and Serve
Once they’re out of the oven, let the Ghostly Cheese Sticks cool for a few minutes. This helps them firm up a bit. Then, serve them up and watch everyone’s faces light up with delight!
Tips for Success
- Use a sharp knife for cutting the cheese sticks; it makes shaping easier.
- Don’t rush the cooling process; it helps the cheese sticks hold their shape.
- Experiment with different toppings like herbs or spices for added flavor.
- For a fun twist, try using different colored olives or peppers!
- Make a double batch; these disappear quickly at parties!
Equipment Needed
- Baking sheet: A standard sheet works great. If you don’t have one, a large plate can do in a pinch.
- Knife: A sharp knife is essential for cutting the cheese. A butter knife can work if you’re careful.
- Spatula: Use this for transferring the cheese sticks after baking. A large spoon can also suffice.
Variations of Ghostly Cheese Sticks
- Spicy Ghosts: Swap black olives for jalapeño slices for a fiery kick that adds a fun twist!
- Herbed Delight: Mix some dried herbs like oregano or basil into the cream cheese for an aromatic flavor boost.
- Cheesy Mix: Use a blend of different cheese sticks, like mozzarella and pepper jack, for a variety of flavors.
- Veggie Ghosts: Top with thinly sliced bell peppers or cherry tomatoes for a colorful and nutritious option.
- Gluten-Free Version: Ensure all ingredients are gluten-free, and serve with gluten-free dipping sauces for a safe snack.
Serving Suggestions for Ghostly Cheese Sticks
- Pair with a side of marinara sauce for a delicious dipping experience.
- Serve alongside fresh veggie sticks like carrots and celery for a balanced snack.
- For drinks, consider apple cider or a spooky punch to complement the Halloween theme.
- Arrange on a festive platter with Halloween decorations for a fun presentation.
FAQs about Ghostly Cheese Sticks
Can I make Ghostly Cheese Sticks ahead of time?
Absolutely! You can prepare the cheese sticks and add the toppings in advance. Just store them in the fridge until you’re ready to bake. This makes it super easy to whip them up when guests arrive!
What can I serve with Ghostly Cheese Sticks?
These spooky snacks pair wonderfully with marinara sauce for dipping. You can also serve them alongside fresh veggies or a spooky punch to keep the Halloween spirit alive!
Are Ghostly Cheese Sticks suitable for kids?
Yes! Kids love the fun shapes and flavors. Plus, they’re a great way to get them involved in the kitchen. Let them help with the decorating for a memorable family activity!
Can I customize the toppings?
Definitely! Feel free to get creative with toppings. You can use different types of olives, add herbs, or even swap in jalapeños for a spicy kick. The options are endless!
How do I store leftovers?
If you have any leftovers, store them in an airtight container in the fridge. They’re best enjoyed fresh, but you can reheat them in the oven for a quick snack later!
Final Thoughts
Creating these Ghostly Cheese Sticks is more than just making a snack; it’s about sharing joy and laughter with family and friends. The smiles on my kids’ faces when they see these spooky treats are priceless. They’re not only quick to whip up but also a fantastic way to get everyone involved in the kitchen. Whether it’s a Halloween party or a cozy family movie night, these cheese sticks add a fun twist to any occasion. So, gather your ingredients, unleash your creativity, and enjoy the delightful experience of making these ghostly goodies together!
PrintGhostly Cheese Sticks: Try This Spooky Snack Recipe!
A fun and spooky snack perfect for Halloween, these Ghostly Cheese Sticks are easy to make and sure to delight both kids and adults.
- Prep Time: 10 minutes
- Cook Time: 7 minutes
- Total Time: 17 minutes
- Yield: 8 servings 1x
- Category: Snack
- Method: Baking
- Cuisine: American
- Diet: Vegetarian
Ingredients
- 8 string cheese sticks
- 1/2 cup black olives, sliced
- 1/2 cup cream cheese
- 1/4 cup edible googly eyes
Instructions
- Preheat the oven to 350°F (175°C).
- Unwrap the string cheese sticks and place them on a baking sheet.
- Using a knife, cut the top of each cheese stick to create a ghostly shape.
- Spread a thin layer of cream cheese over each cheese stick.
- Place two slices of black olives on each cheese stick to create eyes.
- Bake in the preheated oven for 5-7 minutes until the cheese is slightly melted.
- Remove from the oven and let cool slightly before serving.
Notes
- For a spicier version, add jalapeño slices instead of olives.
- These can be served with a side of marinara sauce for dipping.
- Make sure to keep an eye on them while baking to avoid over-melting.
Nutrition
- Serving Size: 1 cheese stick
- Calories: 80
- Sugar: 1g
- Sodium: 200mg
- Fat: 6g
- Saturated Fat: 3g
- Unsaturated Fat: 2g
- Trans Fat: 0g
- Carbohydrates: 1g
- Fiber: 0g
- Protein: 6g
- Cholesterol: 15mg