
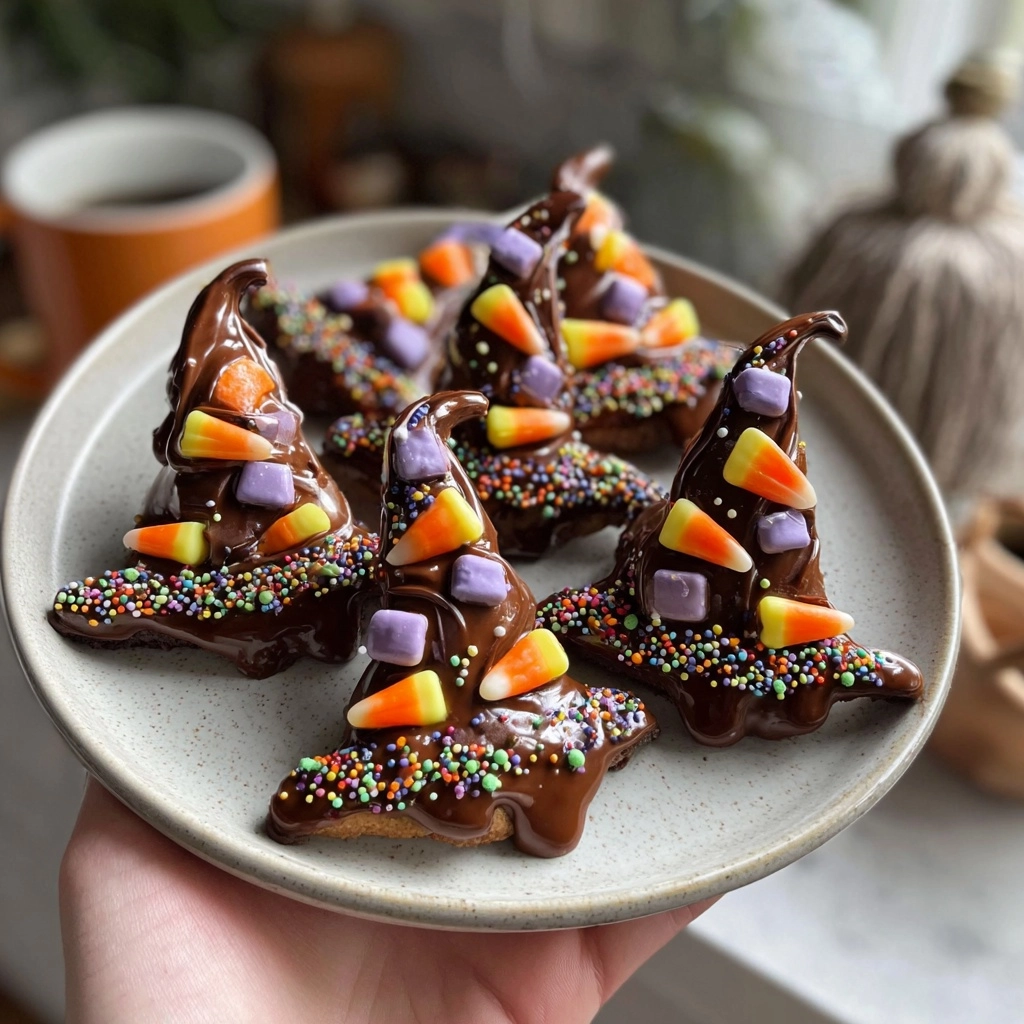
Introduction to Witch Hat Cookies
As the leaves turn and the air gets crisp, I find myself dreaming of Halloween treats. One of my absolute favorites is Witch Hat Cookies. These delightful little confections are not just a feast for the eyes; they’re a quick solution for busy days filled with school events and family gatherings. With their chocolatey goodness and whimsical appearance, they’re sure to impress your loved ones. Plus, they’re so easy to whip up that even the most hectic schedules can accommodate this spooktacular treat. Let’s dive into the magic of baking these enchanting cookies!
Why You’ll Love This Witch Hat Cookies
Witch Hat Cookies are the perfect blend of ease and flavor. They come together in just about 30 minutes, making them a fantastic choice for busy moms like me. The rich chocolate flavor paired with the sweet Hershey’s Kiss creates a delightful treat that everyone will adore. Plus, they’re a fun way to get the kids involved in the kitchen, turning baking into a memorable family activity!
Ingredients for Witch Hat Cookies
Gathering the right ingredients is the first step to creating these delightful Witch Hat Cookies. Here’s what you’ll need:
- Unsalted butter: This adds richness and helps create a tender cookie. Make sure it’s softened for easy mixing.
- Granulated sugar: This sweetener gives the cookies a lovely sweetness and helps with texture.
- Brown sugar: Packed with moisture, it adds a hint of caramel flavor and chewiness to the cookies.
- Large eggs: They bind the ingredients together and add moisture, making the cookies soft and fluffy.
- Vanilla extract: A splash of this aromatic ingredient enhances the overall flavor, making each bite irresistible.
- All-purpose flour: The base of the cookie dough, it provides structure and stability.
- Cocoa powder: This is what gives our cookies that rich chocolate flavor. Use unsweetened for the best results.
- Baking soda: A leavening agent that helps the cookies rise and become light and airy.
- Salt: Just a pinch enhances the sweetness and balances the flavors.
- Hershey’s Kisses: These are the crowning glory of our cookies, resembling the pointy top of a witch’s hat.
- Orange and black sprinkles: These add a festive touch, making your cookies look extra spooktacular!
For those with dietary restrictions, you can easily substitute all-purpose flour with a gluten-free flour blend. If you’re looking to make these cookies ahead of time, they freeze beautifully! You can find the exact measurements for each ingredient at the bottom of the article, ready for printing.
How to Make Witch Hat Cookies
Now that we have our ingredients ready, let’s dive into the fun part: making these Witch Hat Cookies! Follow these simple steps, and you’ll have a batch of delightful treats in no time.
Step 1: Preheat the Oven
First things first, preheat your oven to 350°F (175°C). Preheating is crucial because it ensures that your cookies bake evenly. If you skip this step, your cookies might spread too much or not rise properly. Trust me, a well-preheated oven is the secret to cookie perfection!
Step 2: Cream the Butter and Sugars
In a large bowl, cream together the softened butter, granulated sugar, and brown sugar until the mixture is smooth and fluffy. This process is essential for creating a light texture in your cookies. The air you incorporate while creaming helps them rise beautifully in the oven. It’s like giving your cookies a little boost!
Step 3: Add Eggs and Vanilla
Next, add the eggs and vanilla extract to the creamed mixture. Mix until everything is well combined. The eggs provide moisture and richness, while the vanilla adds a warm, inviting flavor. It’s like a cozy hug for your taste buds!
Step 4: Combine Dry Ingredients
In another bowl, whisk together the all-purpose flour, cocoa powder, baking soda, and salt. Each of these dry ingredients plays a vital role. The flour gives structure, the cocoa powder brings that rich chocolate flavor, the baking soda helps the cookies rise, and the salt enhances the sweetness. It’s a perfect harmony of flavors!
Step 5: Form the Dough
Gradually add the dry ingredients to the wet mixture, mixing until a dough forms. Once your dough is ready, roll it into small balls, about the size of a tablespoon. To ensure uniform cookie sizes, I like to use a cookie scoop. This way, all your cookies will bake evenly, and no one will be left with a tiny cookie!
Step 6: Bake the Cookies
Place the cookie balls on a baking sheet lined with parchment paper, leaving some space between them. Bake for 10-12 minutes, or until the edges are set. To check for doneness, look for a slightly firm edge and a soft center. Remember, they’ll continue to cook a bit after you take them out!
Step 7: Add Hershey’s Kisses
As soon as you pull the cookies from the oven, press a Hershey’s Kiss into the center of each cookie. This step is crucial because it creates the iconic witch hat shape. Be gentle but firm, so the kiss stays in place without breaking the cookie. It’s like placing the cherry on top of a sundae!
Step 8: Decorate with Sprinkles
Once the cookies have cooled slightly, it’s time to get creative! Decorate with orange and black sprinkles to give them that festive Halloween flair. You can even let the kids join in on this part. It’s a fun way to make each cookie unique and add a personal touch!
Tips for Success
- Make sure your butter is softened for easy creaming.
- Use a cookie scoop for uniform cookie sizes.
- Don’t overmix the dough; mix just until combined.
- Let the cookies cool on the baking sheet for a few minutes before transferring them.
- Experiment with different sprinkles for a fun twist!
Equipment Needed
- Baking sheet: A standard one works well, but you can use a stoneware pan for even baking.
- Parchment paper: This helps prevent sticking; aluminum foil can be a substitute.
- Mixing bowls: Use any size, but a large bowl is ideal for creaming.
- Cookie scoop: A tablespoon works too for uniform cookie sizes.
- Whisk: A fork can do the job if you don’t have one handy.
Variations
- For a nutty twist, add 1/2 cup of finely chopped walnuts or pecans to the dough.
- Try using dark chocolate or white chocolate Kisses for a different flavor profile.
- For a minty version, substitute vanilla extract with peppermint extract.
- Make them gluten-free by using a gluten-free flour blend instead of all-purpose flour.
- Add a dash of cinnamon or pumpkin spice to the dough for a seasonal flavor boost.
Serving Suggestions
- Pair these Witch Hat Cookies with a warm cup of apple cider for a cozy treat.
- Serve them on a festive platter adorned with Halloween decorations for a spooky presentation.
- For a fun twist, stack them in a jar and gift them to friends or neighbors.
- Enjoy with a scoop of vanilla ice cream for an indulgent dessert.
FAQs about Witch Hat Cookies
Can I make Witch Hat Cookies ahead of time?
Absolutely! These cookies can be made ahead and stored in an airtight container for up to a week. You can also freeze them for longer storage. Just make sure to let them cool completely before freezing.
What can I use instead of Hershey’s Kisses?
If you want to switch things up, try using chocolate-covered caramel candies or even mini chocolate bars. They’ll still give you that witch hat look while adding a unique twist!
How do I store Witch Hat Cookies?
Store your cookies in an airtight container at room temperature. This keeps them fresh and chewy. If you live in a humid area, consider refrigerating them to maintain their texture.
Can I make these cookies gluten-free?
What’s the best way to decorate Witch Hat Cookies?
Get creative! Use orange and black sprinkles for a classic Halloween look. You can also drizzle melted chocolate over the cookies or add edible glitter for a magical touch!
Final Thoughts
Baking Witch Hat Cookies is more than just a recipe; it’s a delightful experience that brings joy to both the kitchen and the heart. The laughter shared while decorating with sprinkles and the smiles that follow with each bite create lasting memories. These cookies are perfect for Halloween gatherings, school parties, or simply a cozy night in. They remind us that even in our busy lives, there’s always time for a little magic. So, gather your loved ones, roll up your sleeves, and let the fun begin with these spooktacular treats!
PrintWitch Hat Cookies: A Spooktacular Treat Recipe!

Witch Hat Cookies are a fun and festive treat perfect for Halloween, featuring chocolate cookies topped with a Hershey’s Kiss to resemble a witch’s hat.
- Prep Time: 20 minutes
- Cook Time: 12 minutes
- Total Time: 32 minutes
- Yield: 24 cookies 1x
- Category: Dessert
- Method: Baking
- Cuisine: American
- Diet: Vegetarian
Ingredients
- 1 cup unsalted butter, softened
- 1 cup granulated sugar
- 1 cup brown sugar, packed
- 2 large eggs
- 1 teaspoon vanilla extract
- 3 cups all-purpose flour
- 1 cup cocoa powder
- 1 teaspoon baking soda
- 1/2 teaspoon salt
- Hershey’s Kisses, for topping
- Orange and black sprinkles, for decoration
Instructions
- Preheat your oven to 350°F (175°C).
- In a large bowl, cream together the softened butter, granulated sugar, and brown sugar until smooth.
- Add the eggs and vanilla extract, mixing until well combined.
- In another bowl, whisk together the flour, cocoa powder, baking soda, and salt.
- Gradually add the dry ingredients to the wet ingredients, mixing until a dough forms.
- Roll the dough into small balls and place them on a baking sheet lined with parchment paper.
- Bake for 10-12 minutes, or until the edges are set.
- Remove from the oven and immediately press a Hershey’s Kiss into the center of each cookie.
- Allow to cool slightly, then decorate with orange and black sprinkles.
Notes
- For a gluten-free version, substitute all-purpose flour with a gluten-free flour blend.
- Store cookies in an airtight container for up to one week.
- These cookies can be made ahead of time and frozen for later use.
Nutrition
- Serving Size: 1 cookie
- Calories: 150
- Sugar: 10g
- Sodium: 50mg
- Fat: 7g
- Saturated Fat: 4g
- Unsaturated Fat: 2g
- Trans Fat: 0g
- Carbohydrates: 20g
- Fiber: 1g
- Protein: 2g
- Cholesterol: 20mg