
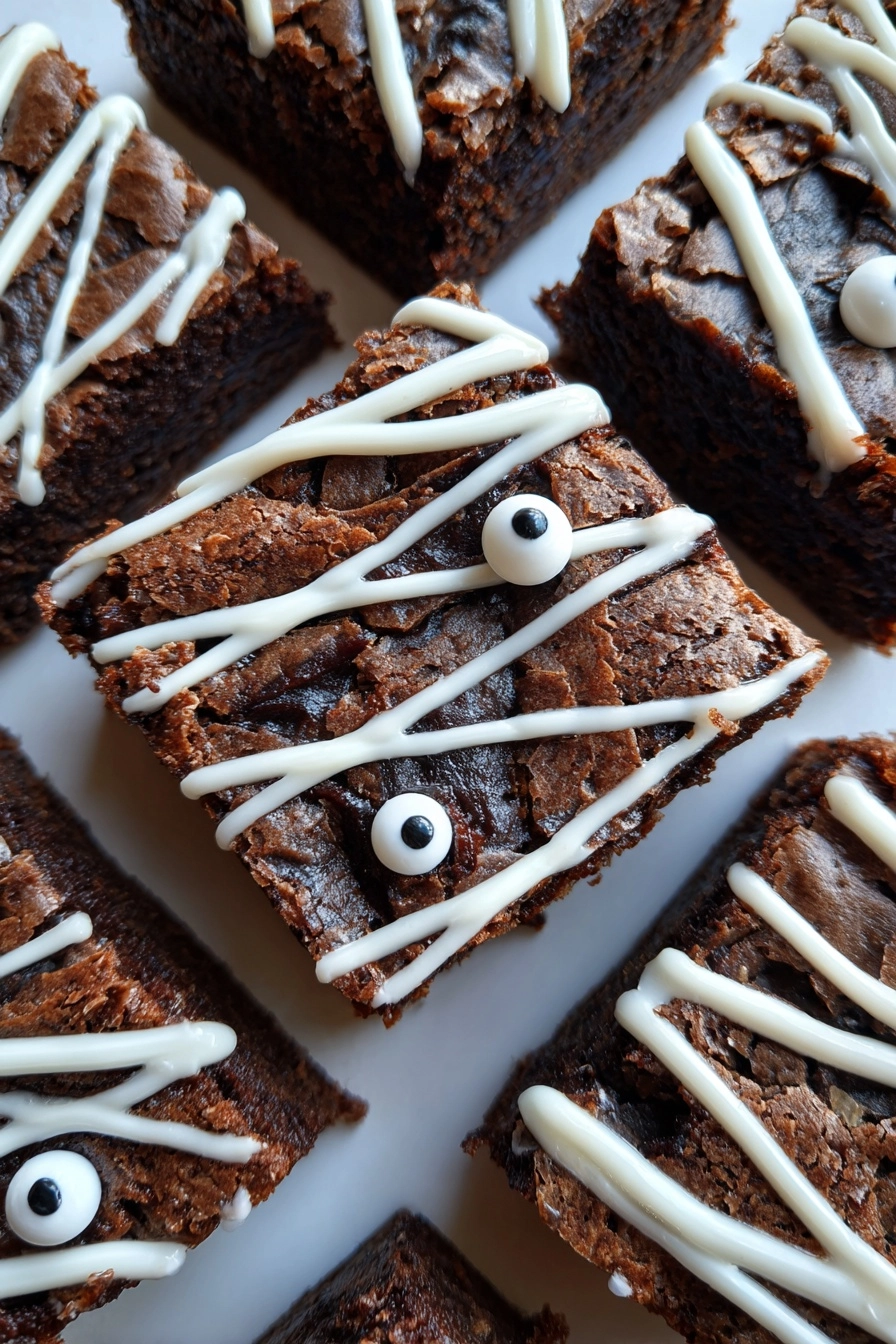
Introduction to Mummy Brownies
As the leaves turn and the air gets crisp, I can’t help but get excited about Halloween. One of my favorite treats to whip up during this spooky season is Mummy Brownies. They’re not just delicious; they’re a fun way to bring a little festive spirit into your kitchen. If you’re a busy mom or professional like me, you’ll appreciate how quick and easy these brownies are to make. Plus, they’re sure to impress your loved ones, making them perfect for parties or family gatherings. Let’s dive into this delightful recipe that’s bound to become a Halloween favorite!
Why You’ll Love This Mummy Brownies
Mummy Brownies are the ultimate solution for busy days when you crave something sweet without spending hours in the kitchen. They come together in just 45 minutes, making them a quick and delightful treat. The rich chocolate flavor paired with the whimsical mummy design is sure to bring smiles to your family’s faces. Plus, they’re a fantastic way to get the kids involved in the kitchen, creating memories while baking together!
Ingredients for Mummy Brownies
Gathering the right ingredients is the first step to creating these delightful Mummy Brownies. Here’s what you’ll need:
- Brownie Mix: A box of your favorite brownie mix serves as the base. It’s quick and easy, perfect for busy days.
- Eggs, Oil, and Water: These are the usual suspects needed to prepare the brownie mix. They help create that fudgy texture we all love.
- White Chocolate Chips: These are melted and drizzled over the brownies to create the mummy’s bandages. You can also use white chocolate bars if you prefer.
- Black Icing or Chocolate: This is used for the eyes. You can find pre-made icing tubes at the store, or melt some dark chocolate for a homemade touch.
Feel free to get creative! You can add chocolate chips to the brownie mix for an extra chocolatey kick. If you’re looking for a healthier option, consider using a low-sugar brownie mix. For exact quantities, check the bottom of the article where you can find everything you need for printing.
How to Make Mummy Brownies
Step 1: Preheat and Prepare
First things first, let’s get that oven preheating to 350°F (175°C). While it warms up, grab your brownie mix and follow the package instructions. Usually, this means mixing in eggs, oil, and water. I love using a whisk for a smooth batter, but a spoon works just fine too. The aroma of chocolate will soon fill your kitchen, making it feel like a cozy haven. Trust me, this is the perfect start to your Mummy Brownies adventure!
Step 2: Bake the Brownies
Now, pour that luscious brownie batter into a greased baking pan. Make sure to spread it evenly for consistent baking. I like to use a spatula to get every last bit out of the bowl. Pop the pan into your preheated oven and bake according to the package directions, usually around 30 minutes. The brownies are done when a toothpick inserted in the center comes out with a few moist crumbs. Your kitchen will smell heavenly, and you’ll be one step closer to those spooky treats!
Step 3: Cool the Brownies
Once the brownies are baked to perfection, it’s crucial to let them cool completely. This step is key for easy decorating later on. If you try to frost them while warm, the chocolate will melt and create a gooey mess. I usually let them cool in the pan for about 10 minutes, then transfer them to a wire rack. Patience is a virtue, especially when it comes to Mummy Brownies!
Step 4: Melt the White Chocolate
While the brownies cool, it’s time to melt those white chocolate chips. Place them in a microwave-safe bowl and heat in 30-second intervals, stirring in between. This prevents burning and ensures a smooth melt. In just a couple of minutes, you’ll have a creamy mixture ready to drizzle. The melted chocolate will create those adorable mummy bandages that make these brownies so special!
Step 5: Decorate the Brownies
Now comes the fun part! Drizzle the melted white chocolate over the cooled brownies in a zigzag pattern to mimic mummy bandages. Don’t worry about being perfect; a little mess adds to the charm! Next, use black icing or melted chocolate to dot on the eyes. I like to make them a bit quirky, giving each mummy its own personality. Your family will love the creativity, and the brownies will look spooktacular!
Step 6: Let Set and Serve
After decorating, let the brownies sit for a few minutes to allow the chocolate to set. This will make serving easier and keep those adorable eyes in place. Once set, cut them into squares and serve them up! Your Mummy Brownies are now ready to delight everyone at your Halloween gathering. Enjoy the smiles and compliments that come your way!
Tips for Success
- Always read the brownie mix instructions for best results.
- Use a toothpick to check for doneness; a few moist crumbs are perfect.
- Let brownies cool completely for easier decorating.
- Experiment with different toppings like sprinkles or colored icing.
- Store leftovers in an airtight container to keep them fresh.
Equipment Needed
- Baking Pan: A 9×9 inch square pan works perfectly. You can also use a round pan if that’s what you have on hand.
- Mixing Bowl: Any large bowl will do for mixing the brownie batter. A glass bowl is great for melting chocolate.
- Whisk or Spoon: Use a whisk for a smooth batter, but a sturdy spoon is just as effective.
- Spatula: A rubber spatula helps scrape every bit of batter from the bowl.
- Microwave-Safe Bowl: Essential for melting the white chocolate chips.
Variations
- Nutty Mummy Brownies: Add chopped nuts like walnuts or pecans to the brownie mix for a delightful crunch.
- Gluten-Free Option: Use a gluten-free brownie mix to make these treats suitable for those with dietary restrictions.
- Minty Mummies: Incorporate mint extract into the brownie batter for a refreshing twist that pairs beautifully with chocolate.
- Vegan Version: Substitute eggs with applesauce or flaxseed meal and use a plant-based brownie mix for a vegan-friendly treat.
- Spicy Mummies: Add a pinch of cayenne pepper or cinnamon to the brownie mix for a surprising kick that complements the chocolate.
Serving Suggestions
- Pair Mummy Brownies with a scoop of vanilla ice cream for a delightful contrast.
- Serve with a glass of cold milk or a warm cup of hot cocoa for a cozy treat.
- For a festive touch, arrange brownies on a Halloween-themed platter.
- Garnish with edible glitter or sprinkles for an extra pop of fun!
FAQs about Mummy Brownies
Can I make Mummy Brownies ahead of time?
Absolutely! These brownies can be made a day or two in advance. Just store them in an airtight container to keep them fresh. This is a great time-saver for busy moms preparing for Halloween parties!
What can I use instead of white chocolate chips?
If you’re not a fan of white chocolate, you can use vanilla candy melts or even a drizzle of melted marshmallows. Both options will still give you that fun mummy look!
How do I store leftover Mummy Brownies?
To keep your Mummy Brownies fresh, store them in an airtight container at room temperature. They should last for about 3-4 days, but I doubt they’ll last that long with all the deliciousness!
Can I customize the decorations on my Mummy Brownies?
Are Mummy Brownies suitable for kids?
Final Thoughts
Making Mummy Brownies is more than just baking; it’s about creating joyful moments in the kitchen. The laughter shared while decorating and the smiles that follow when you serve these spooky treats are priceless. I love how this recipe brings a festive spirit to our home, making Halloween even more special. Whether you’re hosting a party or enjoying a cozy night in, these brownies are sure to delight. So, roll up your sleeves, gather your loved ones, and let the fun begin. Trust me, these Mummy Brownies will become a cherished tradition in your household!
PrintMummy Brownies: A Spooktacular Treat for Halloween!

Mummy Brownies are a fun and festive dessert perfect for Halloween, featuring rich chocolate brownies decorated to look like mummies.
- Prep Time: 15 minutes
- Cook Time: 30 minutes
- Total Time: 45 minutes
- Yield: 12 servings 1x
- Category: Dessert
- Method: Baking
- Cuisine: American
- Diet: Vegetarian
Ingredients
- 1 box of brownie mix
- Ingredients required for brownie mix (usually eggs, oil, and water)
- White chocolate chips
- Black icing or chocolate for eyes
Instructions
- Preheat the oven and prepare the brownie mix according to package instructions.
- Pour the brownie batter into a greased baking pan and bake as directed.
- Once baked, let the brownies cool completely.
- Melt the white chocolate chips in a microwave-safe bowl.
- Drizzle the melted white chocolate over the cooled brownies to create mummy bandages.
- Use black icing or melted chocolate to add eyes to the mummies.
- Let the decorations set before serving.
Notes
- For a richer flavor, consider adding chocolate chips to the brownie mix.
- These brownies can be made ahead of time and stored in an airtight container.
- Feel free to customize the decorations to make them more festive!
Nutrition
- Serving Size: 1 brownie
- Calories: 200
- Sugar: 15g
- Sodium: 150mg
- Fat: 10g
- Saturated Fat: 5g
- Unsaturated Fat: 3g
- Trans Fat: 0g
- Carbohydrates: 25g
- Fiber: 1g
- Protein: 2g
- Cholesterol: 30mg