
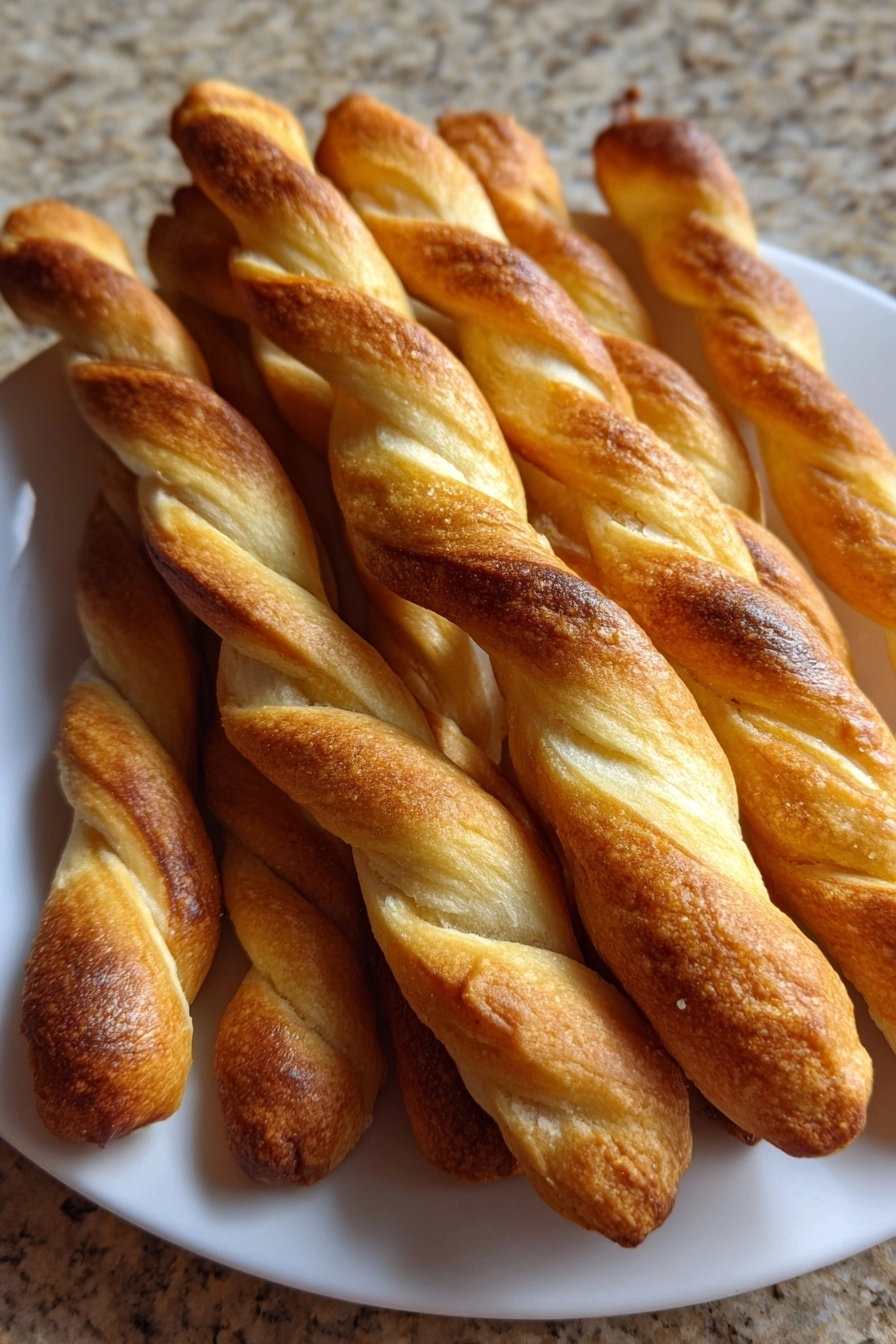
Introduction to Witch’s Fingers Breadsticks
As the leaves turn and the air gets crisp, I can’t help but get excited about Halloween. One of my favorite treats to whip up during this spooky season is Witch’s Fingers Breadsticks. They’re not just fun to make; they’re a delightful way to bring a little magic to your table. Perfect for busy moms like us, these breadsticks are quick to prepare and sure to impress your loved ones. Whether you’re hosting a Halloween party or just want to add some festive flair to dinner, these eerie yet delicious breadsticks are the perfect solution!
Why You’ll Love This Witch’s Fingers Breadsticks
These Witch’s Fingers Breadsticks are a game-changer for busy days. They come together quickly, making them a fantastic option for last-minute gatherings. Plus, the taste is simply irresistible! With a crispy exterior and a soft, chewy inside, they’re perfect for dipping in marinara sauce. Your family will love the spooky shape, and you’ll love how easy they are to make. It’s a win-win for everyone!
Ingredients for Witch’s Fingers Breadsticks
Gathering the right ingredients is the first step to creating these delightful Witch’s Fingers Breadsticks. Here’s what you’ll need:
- Warm water: This activates the yeast, helping the dough rise beautifully.
- Sugar: A little sweetness to feed the yeast and enhance the flavor.
- Active dry yeast: The magic ingredient that makes the breadsticks fluffy and light.
- All-purpose flour: The base of our dough, providing structure and chewiness.
- Salt: Essential for flavor; it balances the sweetness and enhances the overall taste.
- Olive oil: Adds richness and helps keep the breadsticks tender.
- Almonds: These serve as the “fingernails,” giving our breadsticks a spooky touch.
- Green food coloring (optional): For those who want to add an extra eerie vibe to their breadsticks.
For exact measurements, check the bottom of the article where you can find everything listed for easy printing. Feel free to get creative with your ingredients! You can swap in whole wheat flour for a healthier twist or add herbs and spices to the dough for an extra kick. The possibilities are endless!
How to Make Witch’s Fingers Breadsticks
Now that we have our ingredients ready, let’s dive into the fun part—making these Witch’s Fingers Breadsticks! Follow these simple steps, and you’ll have a spooky treat that’s sure to impress.
Step 1: Prepare the Yeast Mixture
Start by combining warm water, sugar, and active dry yeast in a bowl. Give it a gentle stir and let it sit for about 5 minutes. You’ll know it’s ready when it becomes frothy and bubbly. This is the magic moment when the yeast wakes up and gets to work!
Step 2: Make the Dough
Once your yeast mixture is frothy, it’s time to add the all-purpose flour, salt, and olive oil. Mix everything together until a dough starts to form. I like to use a wooden spoon for this part, but your hands work just as well. Don’t be afraid to get a little messy!
Step 3: Knead the Dough
Now comes the fun part—kneading! Sprinkle some flour on your countertop and turn the dough out onto it. Knead the dough for about 5-7 minutes until it’s smooth and elastic. It should feel soft and slightly tacky, but not sticky. This step is crucial for developing that lovely chewy texture.
Step 4: Let the Dough Rise
After kneading, place the dough in a lightly greased bowl and cover it with a clean kitchen towel. Find a warm spot in your kitchen and let it rise for about 1 hour, or until it has doubled in size. This is where the dough gets its fluffy goodness!
Step 5: Shape the Breadsticks
Once the dough has risen, punch it down gently to release the air. Divide the dough into small pieces, about the size of a golf ball. Roll each piece into finger-like sticks, tapering one end to create a point. The more irregular, the spookier!
Step 6: Add Fingernails
To give your breadsticks their signature look, press an almond into the pointed end of each stick. This will resemble a creepy fingernail. You can even use slivered almonds for a more dramatic effect. Just imagine the fun your family will have spotting these “fingers” on the table!
Step 7: Optional Spooky Touch
If you want to take the spooky factor up a notch, brush the breadsticks with a little green food coloring. This step is optional, but it adds a fun, eerie vibe that’s perfect for Halloween. Just a light brush will do the trick!
Step 8: Bake the Breadsticks
Preheat your oven to 375°F (190°C). Place the shaped breadsticks on a baking sheet lined with parchment paper. Bake them for 15-20 minutes, or until they turn golden brown. The aroma will fill your kitchen, making it hard to resist sneaking a taste!
Step 9: Cool and Serve
Once baked, let the breadsticks cool slightly on a wire rack. This will help them firm up a bit. Serve them warm, perhaps with a side of marinara sauce for dipping. Trust me, these Witch’s Fingers Breadsticks will be the star of your Halloween spread!
Tips for Success
- Make sure your water is warm, not hot, to avoid killing the yeast.
- For extra flavor, consider adding garlic powder or Italian herbs to the dough.
- Don’t rush the rising process; a warm environment helps the dough rise better.
- Experiment with different nut toppings for a unique twist on the fingernails.
- Serve immediately for the best texture, but they can be stored for up to 2 days.
Equipment Needed
- Mixing bowl: A large bowl for combining ingredients; any bowl will do!
- Wooden spoon: Perfect for mixing; a spatula works too.
- Floured surface: A countertop or cutting board for kneading.
- Baking sheet: Use any flat tray; line it with parchment paper for easy cleanup.
- Kitchen towel: To cover the dough while it rises; a clean cloth works just as well.
Variations
- Herb-Infused Dough: Add dried herbs like rosemary or thyme to the dough for a fragrant twist.
- Cheesy Fingers: Mix in shredded cheese, like mozzarella or cheddar, for a gooey surprise inside.
- Gluten-Free Option: Substitute all-purpose flour with a gluten-free blend for a celiac-friendly treat.
- Spicy Kick: Incorporate red pepper flakes or cayenne pepper into the dough for a zesty flavor.
- Sweet Version: Transform them into a dessert by adding cinnamon and sugar, and using chocolate chips as “fingernails.”
Serving Suggestions
- Pair your Witch’s Fingers Breadsticks with a warm marinara sauce for dipping.
- Serve alongside a spooky salad with black olives and orange bell peppers for a festive touch.
- For drinks, consider a fun Halloween punch or apple cider.
- Present them on a platter with a few fake spider decorations for added flair!
FAQs about Witch’s Fingers Breadsticks
Can I make Witch’s Fingers Breadsticks ahead of time?
Absolutely! You can prepare the dough a day in advance and let it rise in the fridge overnight. Just bring it back to room temperature before shaping and baking. This makes it a great option for busy days!
What can I serve with Witch’s Fingers Breadsticks?
These spooky breadsticks pair wonderfully with marinara sauce for dipping. You can also serve them with a side of garlic butter or a creamy ranch dressing for a fun twist!
Can I freeze the breadsticks?
Yes, you can freeze the baked breadsticks! Just let them cool completely, then store them in an airtight container. When you’re ready to enjoy, simply reheat them in the oven for a few minutes.
How do I store leftover Witch’s Fingers Breadsticks?
Store any leftovers in an airtight container at room temperature for up to 2 days. If they start to get a bit stale, a quick reheat in the oven will bring back their delightful texture!
Can I customize the shape of the breadsticks?
Of course! While the finger shape is fun for Halloween, you can shape them into traditional breadsticks or even spooky shapes like ghosts or bats. Let your creativity shine!
Final Thoughts
Making Witch’s Fingers Breadsticks is more than just a recipe; it’s a delightful experience that brings a touch of whimsy to your kitchen. The joy of shaping these spooky treats and watching your family’s faces light up as they dig in is truly priceless. Whether you’re hosting a Halloween bash or simply enjoying a cozy night in, these breadsticks are sure to be a hit. Plus, they’re a fantastic way to get your kids involved in the kitchen. So roll up your sleeves, embrace the fun, and let the magic of Halloween fill your home with warmth and laughter!
PrintWitch’s Fingers Breadsticks: A Spooktacular Treat!
Witch’s Fingers Breadsticks are a fun and spooky treat perfect for Halloween parties or themed gatherings. These breadsticks are shaped like fingers and can be made with simple ingredients.
- Prep Time: 20 minutes
- Cook Time: 20 minutes
- Total Time: 1 hour 40 minutes
- Yield: 12 breadsticks 1x
- Category: Appetizer
- Method: Baking
- Cuisine: American
- Diet: Vegetarian
Ingredients
- 1 cup warm water
- 2 teaspoons sugar
- 2 teaspoons active dry yeast
- 3 cups all-purpose flour
- 1 teaspoon salt
- 1/4 cup olive oil
- Almonds (for fingernails)
- Green food coloring (optional)
Instructions
- In a bowl, combine warm water, sugar, and yeast. Let it sit for about 5 minutes until frothy.
- Add flour, salt, and olive oil to the yeast mixture. Mix until a dough forms.
- Knead the dough on a floured surface for about 5-7 minutes until smooth.
- Cover the dough and let it rise in a warm place for about 1 hour or until doubled in size.
- Preheat the oven to 375°F (190°C).
- Divide the dough into small pieces and shape them into finger-like sticks.
- Press an almond into one end of each stick to resemble a fingernail.
- If desired, brush the breadsticks with green food coloring for a spooky effect.
- Bake in the preheated oven for 15-20 minutes or until golden brown.
- Let cool slightly before serving.
Notes
- For a spicier flavor, add garlic powder or herbs to the dough.
- These breadsticks can be served with marinara sauce for dipping.
- Store leftovers in an airtight container for up to 2 days.
Nutrition
- Serving Size: 1 breadstick
- Calories: 150
- Sugar: 1g
- Sodium: 200mg
- Fat: 5g
- Saturated Fat: 0.5g
- Unsaturated Fat: 4.5g
- Trans Fat: 0g
- Carbohydrates: 24g
- Fiber: 1g
- Protein: 4g
- Cholesterol: 0mg