
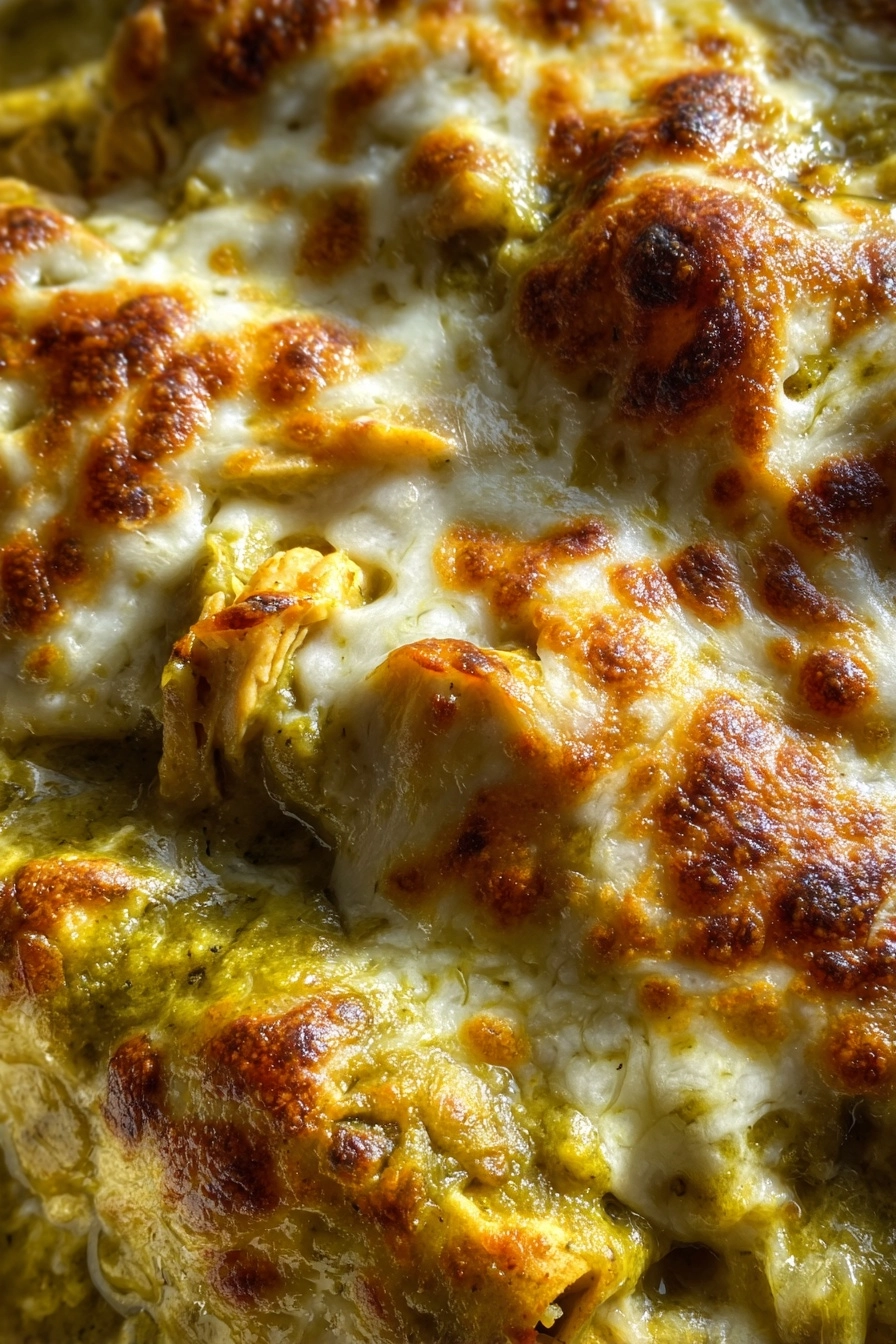
As a busy mom, I know how challenging it can be to whip up a meal that everyone will love. That’s why I adore these Green Chile Chicken Enchiladas! They’re not just a quick solution for a hectic weeknight; they’re also a dish that brings smiles to the dinner table. With tender chicken, zesty green chiles, and a creamy sauce, each bite is a flavor explosion. Plus, they’re easy to prepare, making them perfect for those days when time is tight but you still want to impress your loved ones with something special.

Why You’ll Love This Green Chile Chicken Enchiladas
These Green Chile Chicken Enchiladas are a lifesaver for busy nights. They come together in just 40 minutes, making them a quick and satisfying meal. The combination of creamy sauce and tender chicken creates a comforting dish that feels like a warm hug. Plus, they’re versatile enough to please even the pickiest eaters in your family. Trust me, once you try them, they’ll become a regular on your dinner rotation!
Ingredients for Green Chile Chicken Enchiladas
Gathering the right ingredients is the first step to creating these delightful Green Chile Chicken Enchiladas. Here’s what you’ll need:
- Cooked shredded chicken: This is the star of the dish! You can use rotisserie chicken for convenience or cook your own. It adds protein and heartiness.
- Diced green chiles: These little cans of flavor pack a punch! They bring a mild heat and a unique taste that complements the chicken beautifully.
- Sour cream: This creamy ingredient adds richness and balances the flavors. It also helps bind the filling together.
- Shredded cheese: Cheddar or Monterey Jack works wonders here. It melts beautifully, creating that gooey, comforting layer on top.
- Corn tortillas: These are the perfect vessel for your filling. They’re soft and flavorful, making each bite a delight.
- Green enchilada sauce: This sauce is essential for drenching your enchiladas. It adds moisture and a burst of flavor that ties everything together.
- Garlic powder: A sprinkle of this adds depth and enhances the overall taste of the filling.
- Onion powder: Similar to garlic powder, it brings a savory note that elevates the dish.
- Salt and pepper: These basic seasonings are crucial for bringing out the flavors in your ingredients.

How to Make Green Chile Chicken Enchiladas
Now that you have all your ingredients ready, let’s dive into making these scrumptious Green Chile Chicken Enchiladas! Follow these simple steps, and you’ll have a delightful meal that’s sure to impress.
Step 1: Preheat the Oven
First things first, preheat your oven to 350°F (175°C). Preheating is crucial because it ensures that your enchiladas cook evenly. No one likes a soggy bottom, right? This temperature is perfect for melting the cheese and warming the flavors.
Step 2: Prepare the Chicken Mixture
In a large bowl, combine the cooked shredded chicken, diced green chiles, sour cream, garlic powder, onion powder, salt, and pepper. Mix everything until well combined. The sour cream adds creaminess, while the green chiles bring a delightful kick. This mixture is the heart of your enchiladas!
Step 3: Warm the Tortillas
Next, warm the corn tortillas. You can do this in a skillet over medium heat or in the microwave for about 30 seconds. Warming them makes them pliable, so they won’t tear when you roll them. Trust me, this little step makes a big difference!
Step 4: Fill and Roll the Tortillas
Now it’s time to fill those tortillas! Take a tortilla, spoon some of the chicken mixture onto the center, and roll it up tightly. Don’t overfill, or you’ll have a messy situation on your hands. Place each rolled tortilla seam-side down in your baking dish.
Step 5: Arrange in Baking Dish
As you place the rolled tortillas in the baking dish, make sure they’re snug but not overcrowded. Arranging them seam-side down helps them hold their shape while baking. Plus, it ensures even cooking, so every bite is just as delicious as the last!
Step 6: Add Sauce and Cheese
Pour the green enchilada sauce over the top of the rolled tortillas. Make sure to cover them well; this adds moisture and flavor. Then, sprinkle the shredded cheese generously on top. The cheese will melt into a gooey, golden layer that’s simply irresistible!
Step 7: Bake to Perfection
Pop the baking dish into your preheated oven and bake for 20-25 minutes. You’ll know they’re done when the cheese is melted and bubbly, and the edges of the tortillas are slightly crispy. Your kitchen will smell heavenly at this point!
Step 8: Cool and Serve
Once they’re out of the oven, let the enchiladas cool for a few minutes. This helps the flavors settle and makes them easier to serve. Then, dig in and enjoy the deliciousness you’ve created!
Green Chile Chicken Enchiladas: A Flavorful Delight Awaits!

Green Chile Chicken Enchiladas are a delicious and flavorful dish made with tender chicken, green chiles, and a creamy sauce, all wrapped in soft tortillas and baked to perfection.
- Prep Time: 15 minutes
- Cook Time: 25 minutes
- Total Time: 40 minutes
- Yield: 4 servings 1x
- Category: Main Dish
- Method: Baking
- Cuisine: Mexican
- Diet: Gluten Free
Ingredients
- 2 cups cooked shredded chicken
- 1 can (10 oz) diced green chiles
- 1 cup sour cream
- 1 cup shredded cheese (cheddar or Monterey Jack)
- 8 corn tortillas
- 1 cup green enchilada sauce
- 1/2 teaspoon garlic powder
- 1/2 teaspoon onion powder
- Salt and pepper to taste
Instructions
- Preheat the oven to 350°F (175°C).
- In a bowl, mix the shredded chicken, diced green chiles, sour cream, garlic powder, onion powder, salt, and pepper.
- Warm the corn tortillas in a skillet or microwave to make them pliable.
- Fill each tortilla with the chicken mixture and roll them up tightly.
- Place the rolled tortillas seam-side down in a greased baking dish.
- Pour the green enchilada sauce over the top and sprinkle with shredded cheese.
- Bake in the preheated oven for 20-25 minutes, or until the cheese is melted and bubbly.
- Let cool for a few minutes before serving.
Notes
- For a spicier version, add jalapeños to the chicken mixture.
- Can be made ahead of time and stored in the refrigerator before baking.
- Serve with fresh cilantro and lime wedges for added flavor.
Nutrition
- Serving Size: 1 enchilada
- Calories: 350
- Sugar: 2g
- Sodium: 600mg
- Fat: 18g
- Saturated Fat: 10g
- Unsaturated Fat: 5g
- Trans Fat: 0g
- Carbohydrates: 30g
- Fiber: 3g
- Protein: 20g
- Cholesterol: 70mg
Tips for Success
- Use rotisserie chicken for a quick shortcut; it saves time and adds flavor.
- Warm tortillas in a damp paper towel to keep them soft and pliable.
- Don’t skip the cooling step; it helps the enchiladas hold their shape.
- Experiment with different cheeses for a unique twist on flavor.
- Top with fresh cilantro and lime for a burst of freshness!
Equipment Needed
- Baking dish: A 9×13 inch dish works perfectly, but any oven-safe dish will do.
- Mixing bowl: Use a large bowl for combining the chicken mixture; a sturdy one is best.
- Skillet or microwave: For warming tortillas, either method is effective.
- Spatula: A spatula helps in rolling and transferring the enchiladas.
Variations of Green Chile Chicken Enchiladas
- Vegetarian Option: Substitute the chicken with black beans or sautéed vegetables like zucchini and bell peppers for a hearty meatless meal.
- Spicy Kick: Add diced jalapeños or a splash of hot sauce to the chicken mixture for an extra layer of heat.
- Cheesy Delight: Mix in cream cheese with the sour cream for an even creamier filling that melts beautifully.
- Gluten-Free: Ensure your tortillas and enchilada sauce are gluten-free to accommodate dietary needs.
- Southwestern Twist: Incorporate corn and diced tomatoes into the filling for a burst of flavor and texture.
Serving Suggestions for Green Chile Chicken Enchiladas
- Fresh Salad: Serve with a crisp green salad topped with avocado and lime vinaigrette for a refreshing contrast.
- Rice and Beans: Pair with Mexican rice and refried beans for a hearty meal.
- Drinks: Enjoy with a chilled margarita or a refreshing iced tea.
- Garnish: Top with fresh cilantro, diced tomatoes, and a squeeze of lime for added flavor.
FAQs about Green Chile Chicken Enchiladas
Can I make Green Chile Chicken Enchiladas ahead of time?
Absolutely! You can prepare the enchiladas, place them in the baking dish, and cover them with foil. Store them in the refrigerator for up to 24 hours before baking. This is a great time-saver for busy weeknights!
What can I substitute for sour cream?
If you’re looking for a healthier option, Greek yogurt works wonderfully as a substitute for sour cream. It adds creaminess and a bit of tang without sacrificing flavor.
Can I freeze Green Chile Chicken Enchiladas?
Yes, you can freeze them! Just assemble the enchiladas and wrap them tightly in plastic wrap and foil. They can be frozen for up to three months. When you’re ready to enjoy, thaw in the fridge overnight and bake as directed.
What sides pair well with Green Chile Chicken Enchiladas?
These enchiladas are delicious with a side of Mexican rice, refried beans, or a fresh salad. You can also serve them with guacamole and tortilla chips for a fun twist!
How can I make these enchiladas spicier?
If you love heat, add diced jalapeños to the chicken mixture or use a spicier enchilada sauce. You can also sprinkle some crushed red pepper flakes on top before serving for an extra kick!
Final Thoughts
Making Green Chile Chicken Enchiladas is more than just cooking; it’s about creating memories around the dinner table. The joy of watching my family dig into a dish I’ve prepared with love is truly priceless. Each bite is a reminder of the flavors that bring us together, even on the busiest of nights. Whether it’s a casual weeknight or a special occasion, these enchiladas never fail to impress. I hope you find as much joy in making and sharing this dish as I do. Happy cooking, and may your kitchen always be filled with love and laughter!