
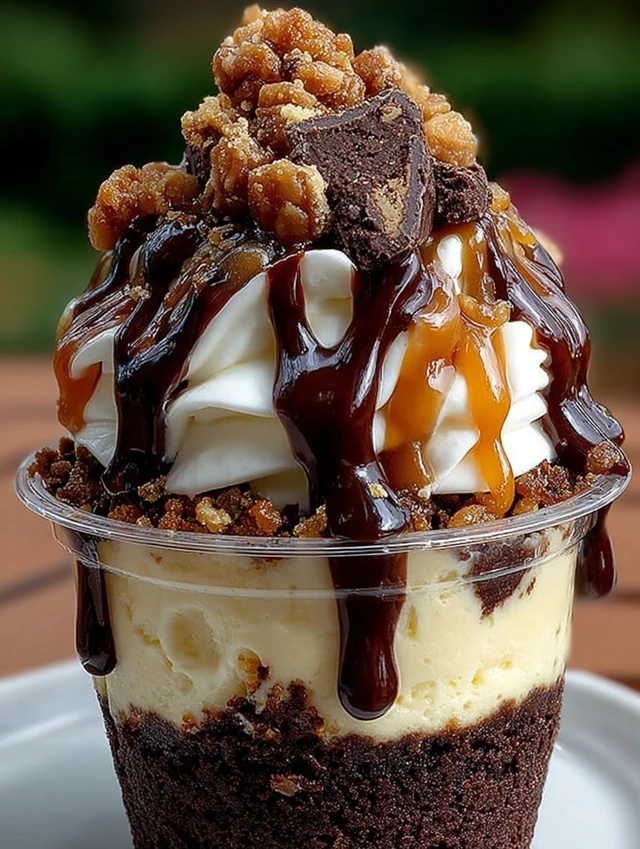
Hey there, fellow dessert lovers! If you’re anything like me, you know that life can get pretty hectic. Between juggling work, family, and everything in between, finding time to whip up a delightful treat can feel impossible. That’s where the Loaded Brownie Cheesecake Cup comes in! This indulgent dessert combines fudgy brownies and creamy cheesecake, making it a quick solution for a busy day or a show-stopping dish to impress your loved ones. Trust me, once you take a bite, you’ll be hooked on this heavenly creation!
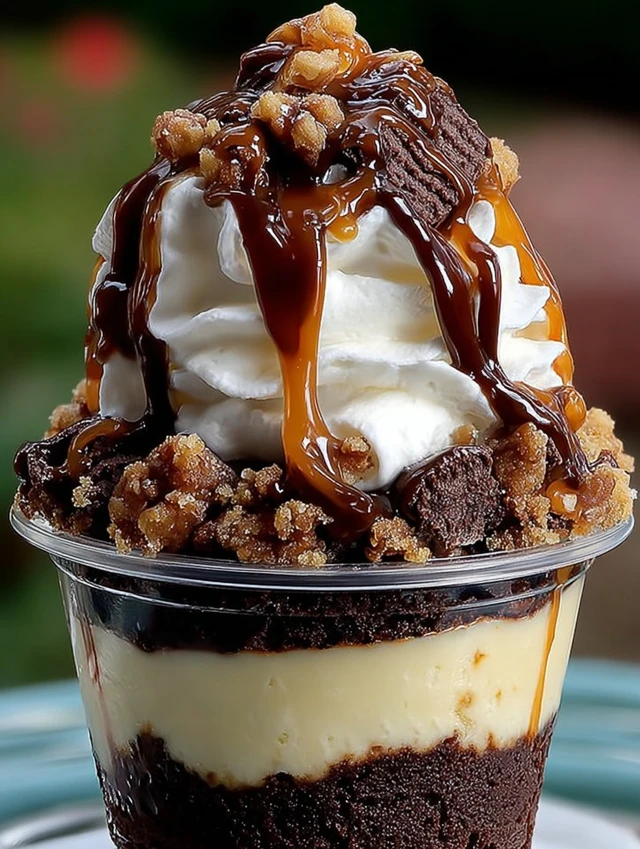
Why You’ll Love This Loaded Brownie Cheesecake Cup
This Loaded Brownie Cheesecake Cup is a dream come true for busy moms and professionals alike. It’s incredibly easy to make, requiring no baking at all! In just 30 minutes of prep time, you can create a dessert that tastes like it came from a fancy bakery. Plus, the combination of rich chocolate and creamy cheesecake is simply irresistible. It’s the perfect treat to satisfy your sweet tooth without the fuss!
Ingredients for Loaded Brownie Cheesecake Cup
Let’s gather our ingredients for this decadent dessert! Each component plays a vital role in creating that perfect balance of flavors and textures. Here’s what you’ll need:
- Fudgy Brownies: The star of the show! Use your favorite homemade or store-bought brownies for that rich, chocolatey base.
- Cream Cheese: This adds a creamy, tangy element to the cheesecake layer. Make sure it’s softened for easy mixing.
- Powdered Sugar: A touch of sweetness that blends seamlessly into the cream cheese, giving it that delightful flavor.
- Vanilla Extract: Just a splash enhances the overall taste, making everything feel a bit more special.
- Heavy Whipping Cream: Whipped to stiff peaks, this ingredient lightens the cheesecake mixture, creating a fluffy texture.
- Chocolate Ganache: Made from melted chocolate and heavy cream, this luscious topping adds a rich finish to your dessert.
- Caramel Sauce: Drizzled on top, it brings a sweet, buttery flavor that pairs beautifully with chocolate.
- Extra Brownie Crumbs: For that finishing touch! Sprinkle these on top for added texture and a visual appeal.
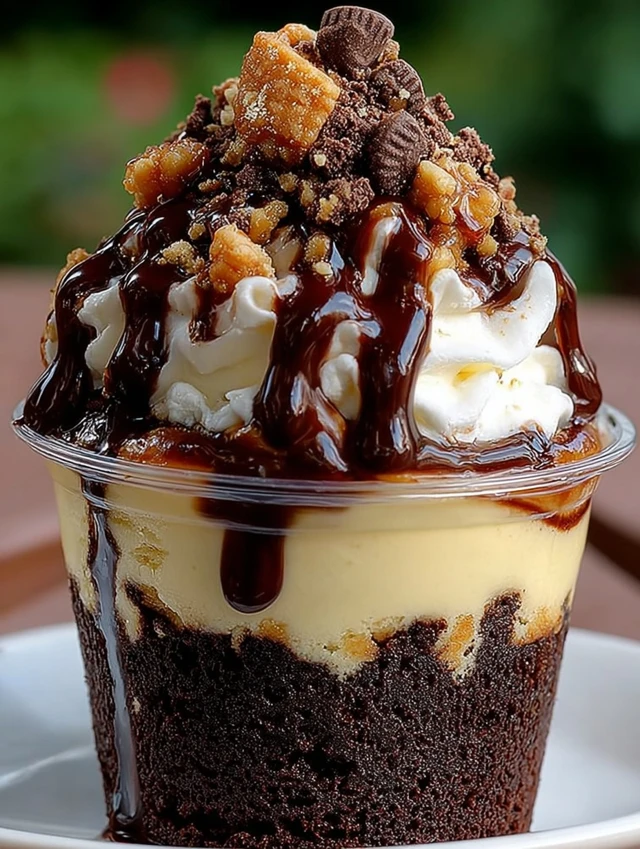
How to Make Loaded Brownie Cheesecake Cup
Now that we have our ingredients ready, let’s dive into the fun part—making these Loaded Brownie Cheesecake Cups! Follow these simple steps, and you’ll have a dessert that’s sure to impress.
Step 1: Prepare the Brownie Layer
Start by crumbling your fudgy brownies into a large bowl. You can use your hands or a fork to break them into small pieces. Aim for a mix of fine crumbs and larger chunks for texture. This brownie layer is the foundation of your dessert, so make sure it’s nice and crumbly!
Step 2: Beat the Cream Cheese
In a separate bowl, take your softened cream cheese and beat it with an electric mixer until it’s smooth and creamy. This step is crucial because it ensures there are no lumps in your cheesecake filling. A smooth mixture will make your Loaded Brownie Cheesecake Cups taste even better!
Step 3: Mix in Sugar and Vanilla
Next, add the powdered sugar and vanilla extract to the cream cheese. Mix everything together until well combined. The powdered sugar sweetens the cream cheese, while the vanilla adds a lovely flavor. You’ll want to taste it at this point—just a little, of course!
Step 4: Fold in Whipped Cream
Now, gently fold in the whipped heavy cream. Use a spatula to combine the whipped cream with the cream cheese mixture. Be careful not to deflate the whipped cream; you want to keep that light, airy texture. This is what makes your cheesecake filling so fluffy and delightful!
Step 5: Layer the Ingredients
It’s time to assemble your cups! Start by adding a layer of crumbled brownies at the bottom of each serving cup. Then, spoon in a generous layer of the cheesecake filling on top. Repeat the layers until you reach the top of the cup. Don’t be shy—make it as tall as you like!
Step 6: Add Toppings
Now for the fun part—toppings! Drizzle chocolate ganache over the top, followed by a swirl of caramel sauce. Finally, sprinkle some extra brownie crumbs for that finishing touch. These toppings not only add flavor but also make your dessert look absolutely stunning!
Step 7: Chill Before Serving
Last but not least, pop your Loaded Brownie Cheesecake Cups in the refrigerator. Let them chill for at least 2 hours before serving. This step is essential as it allows the flavors to meld together and the cheesecake to set. Trust me, the wait will be worth it!
PrintLoaded Brownie Cheesecake Cup
A deliciously indulgent dessert combining fudgy brownies and creamy cheesecake, topped with chocolate ganache and caramel sauce.
- Prep Time: 30 minutes
- Cook Time: 0 minutes
- Total Time: 2 hours 30 minutes
- Yield: 6 servings 1x
- Category: Dessert
- Method: No-bake
- Cuisine: American
- Diet: Vegetarian
Ingredients
- 480 g fudgy brownies, crumbled
- 340 g cream cheese, softened
- 60 g powdered sugar
- 5 ml vanilla extract
- 240 ml heavy whipping cream, whipped to stiff peaks
- Chocolate ganache (made from melted chocolate and heavy cream)
- Caramel sauce
- Extra brownie crumbs
Instructions
- Prepare the brownie layer by crumbling the fudgy brownies into a bowl.
- In a separate bowl, beat the softened cream cheese until smooth.
- Add the powdered sugar and vanilla extract to the cream cheese and mix until well combined.
- Gently fold in the whipped heavy cream until the mixture is smooth and creamy.
- In serving cups, layer the crumbled brownies followed by the cheesecake filling.
- Top with chocolate ganache, caramel sauce, and extra brownie crumbs as desired.
- Chill in the refrigerator for at least 2 hours before serving.
Notes
- For a richer flavor, use high-quality chocolate for the ganache.
- Feel free to add nuts or other toppings as desired.
- These cups can be made a day in advance for convenience.
Nutrition
- Serving Size: 1 cup
- Calories: 450
- Sugar: 35 g
- Sodium: 200 mg
- Fat: 30 g
- Saturated Fat: 15 g
- Unsaturated Fat: 10 g
- Trans Fat: 0 g
- Carbohydrates: 40 g
- Fiber: 2 g
- Protein: 5 g
- Cholesterol: 80 mg
Tips for Success
- Use high-quality chocolate for the ganache to enhance the flavor.
- Make sure your cream cheese is at room temperature for easy mixing.
- Don’t rush the chilling process; it’s key for the best texture.
- Feel free to customize with your favorite toppings or mix-ins.
- These cups can be made a day ahead for stress-free entertaining!
Equipment Needed
- Mixing Bowls: Use any size you have on hand; glass or stainless steel works great.
- Electric Mixer: A hand mixer is perfect, but a whisk will do if you’re feeling strong!
- Spatula: A silicone spatula is ideal for folding in ingredients smoothly.
- Serving Cups: Any small cups or jars will work; get creative with your presentation!
- Refrigerator: Essential for chilling your dessert to perfection.
Variations
- Nutty Delight: Add chopped nuts like walnuts or pecans for a crunchy texture that complements the creamy layers.
- Fruit Fusion: Swap the caramel sauce for a fruit compote, like raspberry or strawberry, for a refreshing twist.
- Gluten-Free Option: Use gluten-free brownies to make this dessert suitable for those with gluten sensitivities.
- Vegan Version: Substitute cream cheese with a vegan alternative and use coconut cream for the whipped layer.
- Minty Fresh: Add a few drops of peppermint extract to the cheesecake filling for a refreshing mint flavor.
Serving Suggestions
- Pair with Coffee: A rich cup of coffee or espresso complements the sweetness perfectly.
- Fresh Berries: Serve with a side of fresh berries for a pop of color and tartness.
- Elegant Presentation: Use clear glass cups to showcase the beautiful layers of your dessert.
- Whipped Cream: Top with a dollop of whipped cream for an extra indulgent touch.
- Chocolate Shavings: Garnish with chocolate shavings for a sophisticated finish.
FAQs about Loaded Brownie Cheesecake Cup
As you embark on your journey to create these Loaded Brownie Cheesecake Cups, you might have a few questions. Don’t worry; I’ve got you covered! Here are some common queries that pop up when making this delightful dessert.
Can I make Loaded Brownie Cheesecake Cups in advance?
Absolutely! These cups can be made a day ahead. Just store them in the refrigerator, and they’ll be ready to impress your guests when you are!
What can I substitute for cream cheese?
If you’re looking for a lighter option, you can use Greek yogurt or a vegan cream cheese alternative. Both will still give you that creamy texture!
How long do these cups last in the fridge?
These Loaded Brownie Cheesecake Cups can last up to 3 days in the fridge. Just make sure they’re covered to keep them fresh!
Can I use store-bought brownies?
Of course! Store-bought brownies are a great time-saver. Just crumble them up, and you’re good to go!
What’s the best way to serve these cups?
Serve them chilled in clear cups to showcase those beautiful layers. A sprinkle of extra brownie crumbs on top adds a lovely finishing touch!
Final Thoughts
Creating these Loaded Brownie Cheesecake Cups is more than just making a dessert; it’s about bringing joy to your kitchen and delighting your loved ones. Each layer tells a story of indulgence, from the fudgy brownies to the creamy cheesecake. The best part? You can whip them up in no time, making them perfect for busy days or special occasions. So, whether you’re treating yourself or impressing guests, these cups are sure to bring smiles all around. Dive into this delicious adventure, and let the flavors transport you to dessert heaven!