
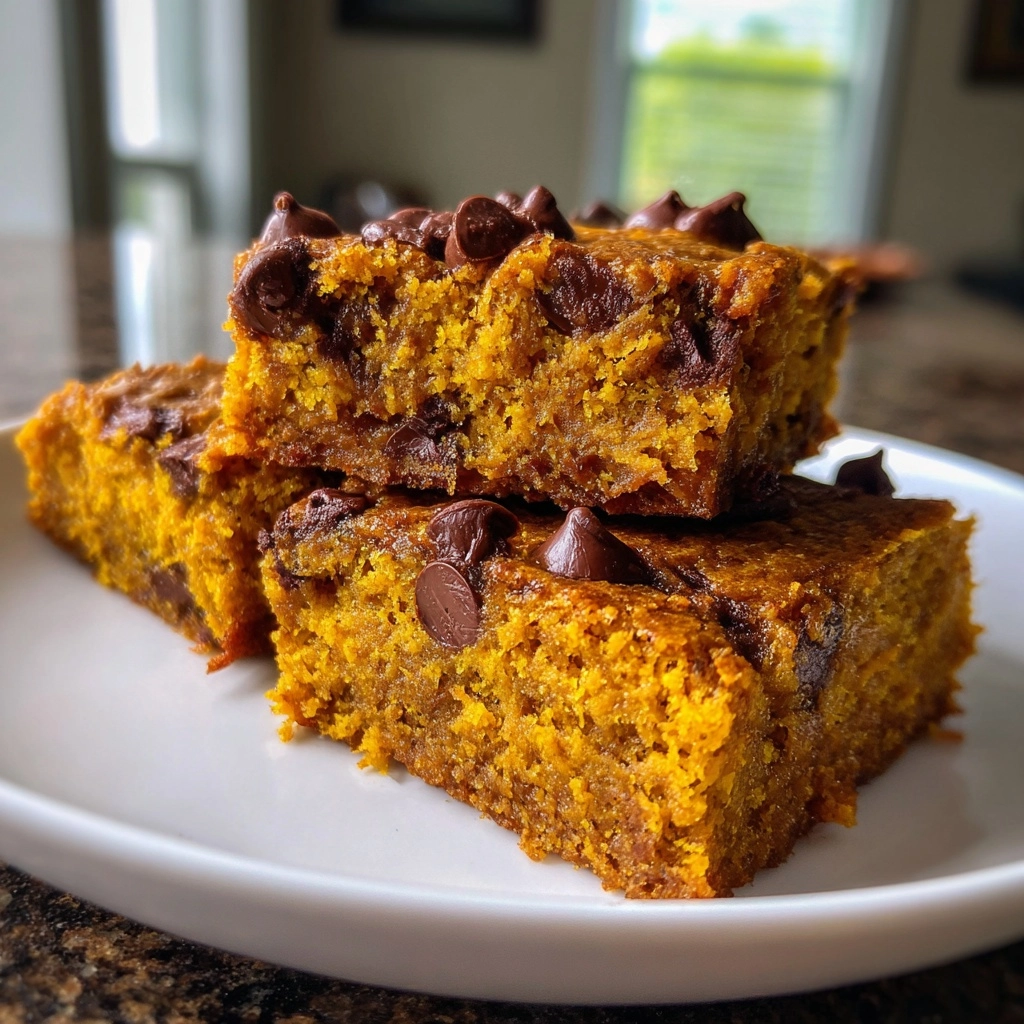
Introduction to Pumpkin Bars with Chocolate Chips
As the leaves turn and the air gets crisp, I find myself craving the warm, cozy flavors of fall. That’s when I whip up my favorite treat: Pumpkin Bars with Chocolate Chips. These bars are not just a dessert; they’re a hug in a pan! Perfect for busy days, they come together quickly and are sure to impress your loved ones. Whether you’re hosting a gathering or just need a sweet pick-me-up, these bars are the answer. Trust me, once you take a bite, you’ll be transported to a pumpkin patch on a sunny autumn day!
Why You’ll Love This Pumpkin Bars with Chocolate Chips
These Pumpkin Bars with Chocolate Chips are a delightful blend of flavors that will make your taste buds dance! They’re incredibly easy to make, taking just 15 minutes of prep time. Plus, they bake up in a snap, so you can enjoy them fresh from the oven in no time. The combination of pumpkin and chocolate is simply irresistible, making these bars a perfect treat for any occasion. You’ll love how they fill your home with the scent of fall!
Ingredients for Pumpkin Bars with Chocolate Chips
Gathering the right ingredients is the first step to creating these delightful Pumpkin Bars with Chocolate Chips. Here’s what you’ll need:
- Pumpkin puree: This is the star of the show! It adds moisture and that lovely pumpkin flavor.
- Sugar: A touch of sweetness to balance the spices and enhance the chocolate.
- Vegetable oil: This keeps the bars moist and tender. You can substitute with melted coconut oil for a different flavor.
- Eggs: They help bind everything together, giving the bars a nice structure.
- All-purpose flour: The base of the recipe, providing the necessary structure. For a gluten-free option, try almond flour or a gluten-free blend.
- Baking powder and baking soda: These leavening agents help the bars rise and become fluffy.
- Ground cinnamon: A warm spice that brings out the fall flavors. You can also use pumpkin pie spice for an extra kick.
- Ground nutmeg: Just a pinch adds depth and warmth to the flavor profile.
- Salt: A little salt enhances all the flavors, making them pop!
- Chocolate chips: The sweet surprise in every bite! You can use semi-sweet, dark, or even white chocolate chips for a twist.
For those who like to experiment, consider adding chopped nuts or dried fruits for added texture. You can find the exact measurements for these ingredients at the bottom of the article, ready for printing!
How to Make Pumpkin Bars with Chocolate Chips
Now that we have our ingredients ready, let’s dive into the fun part: making these delicious Pumpkin Bars with Chocolate Chips! Follow these simple steps, and you’ll have a delightful treat in no time.
Step 1: Preheat the Oven
First things first, preheat your oven to 350°F (175°C). This step is crucial because it ensures even baking. While the oven warms up, grease a 9×13 inch baking pan. You can use cooking spray or butter. This will help the bars come out easily once they’re baked.
Step 2: Mix Wet Ingredients
In a large bowl, combine the pumpkin puree, sugar, vegetable oil, and eggs. I like to use a whisk for this part. It helps blend everything smoothly. Mix until the ingredients are well combined and the sugar starts to dissolve. The mixture should be creamy and inviting!
Step 3: Combine Dry Ingredients
In another bowl, whisk together the all-purpose flour, baking powder, baking soda, ground cinnamon, ground nutmeg, and salt. This step is important because it evenly distributes the leavening agents and spices. You want to make sure every bite of your Pumpkin Bars with Chocolate Chips is packed with flavor!
Step 4: Combine Wet and Dry Mixtures
Now, it’s time to bring the two mixtures together. Gradually add the dry ingredients to the wet mixture. Stir gently until just combined. Be careful not to overmix! A few lumps are perfectly fine. Overmixing can lead to tough bars, and we want them soft and tender.
Step 5: Fold in Chocolate Chips
Here comes the best part! Gently fold in the chocolate chips using a spatula. This technique helps distribute the chips evenly without breaking them. You want those little pockets of chocolate goodness in every bite!
Step 6: Bake the Bars
Pour the batter into your prepared baking pan and spread it evenly. Bake in the preheated oven for 25-30 minutes. To check for doneness, insert a toothpick into the center. If it comes out clean or with a few moist crumbs, your bars are ready!
Step 7: Cool and Cut
Once baked, remove the pan from the oven and let it cool for about 10-15 minutes. This cooling time is essential. If you cut them too soon, they might crumble. After cooling, slice them into bars and enjoy your delicious Pumpkin Bars with Chocolate Chips!
Tips for Success
- Always measure your ingredients accurately for the best results.
- Use room temperature eggs for better mixing.
- Don’t skip the cooling time; it helps the bars set properly.
- For extra flavor, try adding a splash of vanilla extract.
- Store leftovers in an airtight container to keep them fresh.
Equipment Needed
- 9×13 inch baking pan: A standard size for these bars. You can use a glass or metal pan.
- Mixing bowls: A large bowl for wet ingredients and a medium bowl for dry ingredients.
- Whisk: Perfect for mixing wet ingredients. A fork works too!
- Spatula: Great for folding in chocolate chips and spreading the batter.
- Toothpick: Essential for checking doneness. A cake tester or knife can work as well.
Variations of Pumpkin Bars with Chocolate Chips
- Nutty Delight: Add chopped walnuts or pecans for a crunchy texture that complements the soft bars.
- Spiced Up: Experiment with additional spices like ginger or cloves for a more robust flavor profile.
- Gluten-Free: Substitute all-purpose flour with a gluten-free blend or almond flour for a gluten-free version.
- Vegan Option: Replace eggs with flax eggs (1 tablespoon of flaxseed meal mixed with 2.5 tablespoons of water) and use a plant-based oil.
- Chocolate Lovers: Use a mix of chocolate chips, such as dark and white chocolate, for a decadent twist.
Serving Suggestions for Pumpkin Bars with Chocolate Chips
- Pair with a dollop of whipped cream for a delightful contrast in texture.
- Serve alongside a warm cup of spiced chai or apple cider for a cozy experience.
- Dust with powdered sugar for an elegant touch before serving.
- Top with a scoop of vanilla ice cream for an indulgent dessert.
- Garnish with a sprinkle of cinnamon for added flavor and visual appeal.
FAQs about Pumpkin Bars with Chocolate Chips
As I’ve shared my love for these Pumpkin Bars with Chocolate Chips, I often get questions from fellow home cooks. Here are some of the most common queries I hear:
Can I use fresh pumpkin instead of canned puree?
Absolutely! If you have fresh pumpkin, just roast it until tender, then puree it. It adds a lovely, fresh flavor to your bars.
How do I store leftover Pumpkin Bars with Chocolate Chips?
Store them in an airtight container at room temperature for up to three days. If you want to keep them longer, they freeze beautifully for up to three months!
Can I make these bars ahead of time?
Yes! You can bake them a day in advance. Just let them cool completely, then cover and store. They taste even better the next day as the flavors meld!
What can I substitute for chocolate chips?
If you’re not a fan of chocolate, try using dried cranberries, raisins, or even white chocolate chips for a different twist!
Are these bars suitable for a gluten-free diet?
Yes! Simply swap the all-purpose flour for a gluten-free blend or almond flour. They’ll still be delicious and moist!
Final Thoughts
Making Pumpkin Bars with Chocolate Chips is more than just baking; it’s about creating memories. The aroma wafting through your kitchen will transport you to cozy autumn days, filled with laughter and warmth. These bars are perfect for sharing with family or enjoying during a quiet moment with a cup of tea. Each bite is a delightful blend of flavors that brings joy to your day. So, whether you’re celebrating a special occasion or simply indulging in a sweet treat, these bars are sure to become a cherished favorite in your home. Happy baking!
PrintPumpkin Bars with Chocolate Chips: A Delicious Fall Treat!

Pumpkin Bars with Chocolate Chips are a delightful fall treat that combines the rich flavors of pumpkin and warm spices with the sweetness of chocolate chips.
- Prep Time: 15 minutes
- Cook Time: 30 minutes
- Total Time: 45 minutes
- Yield: 12 bars 1x
- Category: Dessert
- Method: Baking
- Cuisine: American
- Diet: Vegetarian
Ingredients
- 1 cup pumpkin puree
- 1 cup sugar
- 1/2 cup vegetable oil
- 2 large eggs
- 1 1/2 cups all-purpose flour
- 1 tsp baking powder
- 1 tsp baking soda
- 1 tsp ground cinnamon
- 1/2 tsp ground nutmeg
- 1/2 tsp salt
- 1 cup chocolate chips
Instructions
- Preheat the oven to 350°F (175°C) and grease a 9×13 inch baking pan.
- In a large bowl, mix together the pumpkin puree, sugar, vegetable oil, and eggs until well combined.
- In another bowl, whisk together the flour, baking powder, baking soda, cinnamon, nutmeg, and salt.
- Gradually add the dry ingredients to the wet ingredients, mixing until just combined.
- Fold in the chocolate chips.
- Pour the batter into the prepared baking pan and spread evenly.
- Bake for 25-30 minutes or until a toothpick inserted in the center comes out clean.
- Allow to cool before cutting into bars and serving.
Notes
- Store leftovers in an airtight container at room temperature for up to 3 days.
- For a richer flavor, add chopped nuts or additional spices.
- These bars can be frozen for up to 3 months.
Nutrition
- Serving Size: 1 bar
- Calories: 180
- Sugar: 12g
- Sodium: 150mg
- Fat: 7g
- Saturated Fat: 1g
- Unsaturated Fat: 6g
- Trans Fat: 0g
- Carbohydrates: 25g
- Fiber: 1g
- Protein: 2g
- Cholesterol: 20mg