
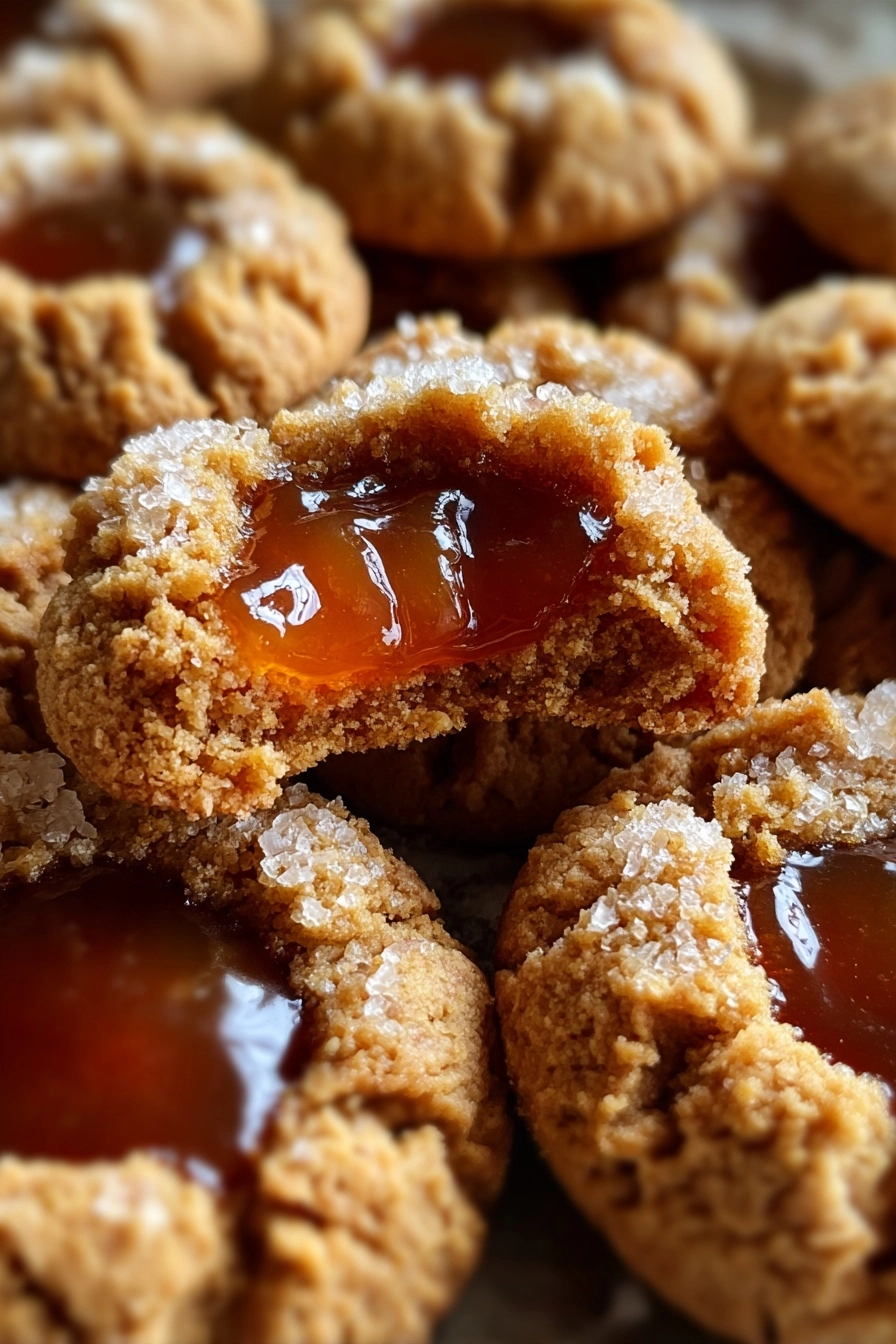
Gluten-Free Apple Butter Thumbprint Cookies
As a busy mom, I know how precious time can be, especially when it comes to baking. That’s why I adore these Gluten-Free Apple Butter Thumbprint Cookies! They’re not just a delightful treat; they’re a quick solution for those hectic days when you want to whip up something special without spending hours in the kitchen. The soft, buttery cookies filled with sweet apple butter are sure to impress your loved ones. Plus, they’re gluten-free, making them perfect for everyone to enjoy. Let’s dive into this delicious recipe that brings joy to both baking and sharing!
Why You’ll Love This Gluten-Free Apple Butter Thumbprint Cookies
These Gluten-Free Apple Butter Thumbprint Cookies are a dream come true for busy moms and professionals alike. They come together in just 30 minutes, making them perfect for last-minute gatherings or cozy family nights. The combination of soft cookie and rich apple butter creates a flavor explosion that will have everyone asking for seconds. Plus, they’re gluten-free, so you can share them with friends and family without worry!
Ingredients for Gluten-Free Apple Butter Thumbprint Cookies
Gathering the right ingredients is the first step to creating these delightful Gluten-Free Apple Butter Thumbprint Cookies. Here’s what you’ll need:
- Gluten-free all-purpose flour: This is the base of your cookies, providing structure without the gluten. Look for a blend that includes xanthan gum for the best results.
- Unsalted butter: Softened butter adds richness and flavor. Using unsalted allows you to control the saltiness of your cookies.
- Sugar: Granulated sugar sweetens the dough and helps achieve that lovely golden color when baked.
- Salt: Just a pinch enhances the flavors, balancing the sweetness of the cookies.
- Vanilla extract: This adds a warm, inviting flavor that complements the apple butter beautifully.
- Baking powder: A leavening agent that helps the cookies rise, giving them a light and fluffy texture.
- Apple butter: The star of the show! This sweet, spiced spread fills the thumbprint and adds a burst of flavor. You can also use other fruit preserves if you want to mix things up.
For exact measurements, check the bottom of the article where you can find everything listed for easy printing. Happy baking!
How to Make Gluten-Free Apple Butter Thumbprint Cookies
Step 1: Preheat the Oven
Preheating your oven to 350°F (175°C) is crucial for baking these cookies perfectly. It ensures that the cookies start baking at the right temperature, allowing them to rise and develop that lovely golden color. Trust me, a well-preheated oven makes all the difference!
Step 2: Cream Butter and Sugar
In a mixing bowl, cream together the softened butter and sugar until the mixture is light and fluffy. This step is essential because it incorporates air into the dough, giving your cookies a tender texture. Aim for a pale, creamy consistency, which usually takes about 2-3 minutes of mixing. Your arms might get a workout, but it’s worth it!
Step 3: Add Vanilla Extract
Next, stir in the vanilla extract. This simple addition elevates the flavor of your cookies, making them taste warm and inviting. The aroma of vanilla wafting through your kitchen is just the cherry on top of this baking adventure!
Step 4: Combine Dry Ingredients
In a separate bowl, mix the gluten-free flour, salt, and baking powder. Combining dry ingredients separately helps ensure even distribution of the leavening agent, which is key for achieving that perfect rise. This step prevents any clumps and guarantees a consistent texture throughout your cookies.
Step 5: Form the Dough
Now it’s time to form the dough! Roll it into small balls, about the size of a tablespoon. This size is perfect for thumbprint cookies, ensuring they bake evenly. If the dough feels sticky, a light dusting of gluten-free flour on your hands can help!
Step 6: Create Indentations
Using your thumb, gently press down in the center of each dough ball to create an indentation. This step is essential because it creates a cozy little spot for the apple butter to sit. Don’t worry if it’s not perfect; a little imperfection adds character!
Step 7: Fill with Apple Butter
Now comes the fun part! Fill each indentation with a generous dollop of apple butter. This filling not only adds a burst of flavor but also keeps the cookies moist. You can be a bit generous here; after all, who doesn’t love a little extra sweetness?
Step 8: Bake the Cookies
Place your baking sheet in the preheated oven and bake for 12-15 minutes. Keep an eye on them; you want the edges to be lightly golden. A quick tip: if you gently press the center and it springs back, they’re done!
Step 9: Cool Before Serving
Once baked, allow the cookies to cool on the baking sheet for a few minutes before transferring them to a wire rack. Cooling is important because it helps the cookies set, ensuring they maintain their shape and texture. Plus, it gives you a moment to savor the delicious aroma!
Tips for Success
- Make sure your butter is softened to room temperature for easy creaming.
- Use a cookie scoop for uniform cookie sizes, ensuring even baking.
- Chill the dough for 15 minutes if it feels too sticky to handle.
- Experiment with different fruit preserves for unique flavors.
- Don’t skip the cooling step; it enhances the cookie’s texture.
Equipment Needed
- Mixing bowl: A large bowl for combining ingredients. A sturdy glass or ceramic bowl works well.
- Electric mixer: Ideal for creaming butter and sugar. A whisk can work in a pinch, but it’ll take more effort!
- Baking sheet: A flat tray for baking cookies. Line it with parchment paper for easy cleanup.
- Cookie scoop: For uniform cookie sizes. A tablespoon works too if you don’t have one.
- Wire rack: Perfect for cooling cookies. If you don’t have one, a plate will do!
Variations
- Nutty Delight: Add chopped nuts like walnuts or pecans to the dough for a crunchy texture and added flavor.
- Spiced Up: Incorporate a teaspoon of cinnamon or nutmeg into the dough for a warm, spiced flavor that pairs beautifully with apple butter.
- Chocolate Lovers: Mix in some dairy-free chocolate chips for a sweet twist that chocolate lovers will adore.
- Vegan Option: Substitute the butter with coconut oil and use a flax egg instead of regular eggs for a vegan-friendly version.
- Fruit Fusion: Experiment with different fruit butters like peach or raspberry for a unique flavor profile.
Serving Suggestions
- Pair these cookies with a warm cup of chai or spiced apple cider for a cozy treat.
- Serve alongside a scoop of vanilla ice cream for a delightful dessert experience.
- For a festive touch, dust with powdered sugar before serving.
- Arrange on a decorative platter for a beautiful presentation at gatherings.
FAQs about Gluten-Free Apple Butter Thumbprint Cookies
Can I use regular flour instead of gluten-free flour?
While I love the texture of these cookies with gluten-free flour, you can use regular all-purpose flour if gluten isn’t a concern. Just remember, the baking time may vary slightly!
How should I store the cookies?
Store your Gluten-Free Apple Butter Thumbprint Cookies in an airtight container at room temperature. They’ll stay fresh for up to a week, but I doubt they’ll last that long!
Can I freeze these cookies?
Absolutely! These cookies freeze beautifully. Just place them in a single layer in a freezer-safe container. When you’re ready to enjoy, let them thaw at room temperature.
What can I substitute for apple butter?
If you don’t have apple butter on hand, feel free to use other fruit preserves like apricot or raspberry. Each will give a unique twist to your cookies!
Are these cookies suitable for kids?
Yes! These Gluten-Free Apple Butter Thumbprint Cookies are perfect for kids. They’re soft, sweet, and fun to eat. Plus, they’re a great way to introduce gluten-free treats to little ones!
Summarizing the Joy of Baking Gluten-Free Apple Butter Thumbprint Cookies
Baking these Gluten-Free Apple Butter Thumbprint Cookies is more than just a culinary task; it’s a delightful experience that fills your kitchen with warmth and sweet aromas. Each step, from creaming the butter to filling the thumbprints, brings a sense of accomplishment and joy. Watching your loved ones savor these soft, flavorful cookies is truly rewarding. Whether it’s a cozy family gathering or a simple afternoon treat, these cookies create moments of happiness. So, roll up your sleeves, embrace the mess, and enjoy the sweet satisfaction of sharing your homemade creations with those you cherish!
PrintGluten-Free Apple Butter Thumbprint Cookies You’ll Love!

Delicious and soft gluten-free thumbprint cookies filled with apple butter, perfect for any occasion.
- Prep Time: 15 minutes
- Cook Time: 15 minutes
- Total Time: 30 minutes
- Yield: 24 cookies 1x
- Category: Dessert
- Method: Baking
- Cuisine: American
- Diet: Gluten Free
Ingredients
- 1 cup gluten-free all-purpose flour
- 1/2 cup unsalted butter, softened
- 1/2 cup sugar
- 1/4 teaspoon salt
- 1 teaspoon vanilla extract
- 1/4 teaspoon baking powder
- 1/2 cup apple butter
Instructions
- Preheat the oven to 350°F (175°C).
- In a mixing bowl, cream together the softened butter and sugar until light and fluffy.
- Add in the vanilla extract and mix well.
- In a separate bowl, combine the gluten-free flour, salt, and baking powder.
- Gradually add the dry ingredients to the wet mixture, mixing until a dough forms.
- Roll the dough into small balls and place them on a baking sheet lined with parchment paper.
- Make an indentation in the center of each ball using your thumb.
- Fill each indentation with apple butter.
- Bake for 12-15 minutes or until the edges are lightly golden.
- Allow to cool before serving.
Notes
- Store cookies in an airtight container for up to a week.
- Feel free to substitute apple butter with other fruit preserves if desired.
- For a sweeter cookie, add a bit more sugar to the dough.
Nutrition
- Serving Size: 1 cookie
- Calories: 120
- Sugar: 8g
- Sodium: 50mg
- Fat: 6g
- Saturated Fat: 4g
- Unsaturated Fat: 2g
- Trans Fat: 0g
- Carbohydrates: 15g
- Fiber: 1g
- Protein: 1g
- Cholesterol: 20mg