
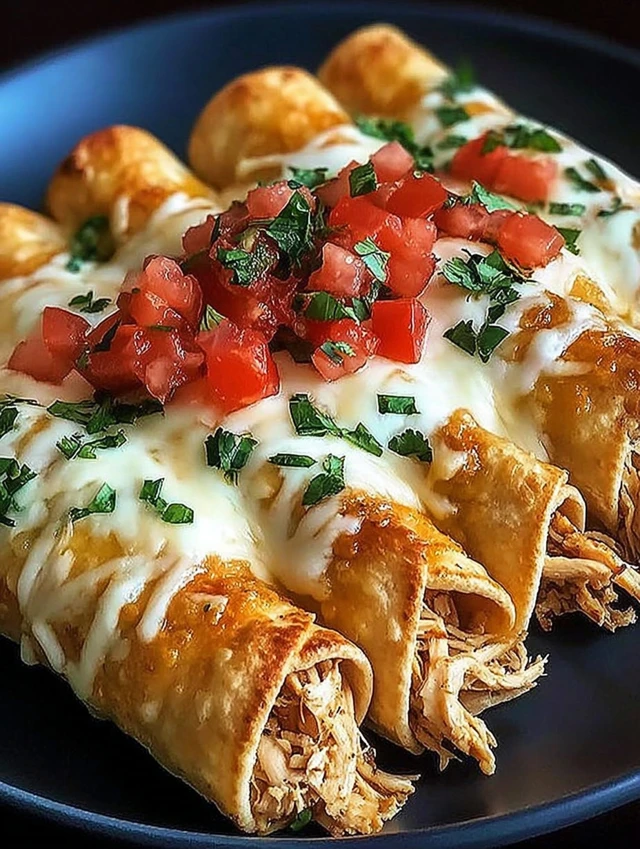
As a busy mom, I know how challenging it can be to whip up something delicious that everyone will love. That’s where these Baked Cream Cheese Chicken Taquitos come in! They’re not just a quick solution for a hectic day; they’re also a delightful way to impress your loved ones. Imagine crispy, golden taquitos filled with creamy chicken and cheese, bursting with flavor in every bite. Whether it’s game night or a cozy family dinner, these taquitos are sure to become a favorite in your home. Let’s dive into this tasty adventure together!

Why You’ll Love This Baked Cream Cheese Chicken Taquitos
These Baked Cream Cheese Chicken Taquitos are a lifesaver for busy days! They come together in just 35 minutes, making them perfect for a quick snack or appetizer. The creamy filling is a crowd-pleaser, and the baked version means less guilt and mess than frying. Plus, you can customize them to suit your family’s tastes, ensuring everyone leaves the table happy. What’s not to love?
Ingredients for Baked Cream Cheese Chicken Taquitos
Gathering the right ingredients is the first step to creating these mouthwatering Baked Cream Cheese Chicken Taquitos. Here’s what you’ll need:
- Cooked shredded chicken: This is the star of the show! You can use leftover rotisserie chicken or quickly cook some chicken breasts.
- Cream cheese: Softened cream cheese adds a rich, creamy texture that binds everything together beautifully.
- Shredded cheddar or Monterey Jack cheese: These cheeses melt wonderfully and add a delicious cheesy flavor to the filling.
- Salsa: Choose your preferred heat level! Salsa adds moisture and a burst of flavor to the filling.
- Ground cumin: This spice brings a warm, earthy flavor that complements the chicken perfectly.
- Chili powder: A little kick of chili powder enhances the overall taste and gives it that Mexican flair.
- Salt and freshly ground black pepper: Essential for seasoning, these will elevate the flavors of your filling.
- Chopped green onions or fresh cilantro (optional): These fresh herbs add a pop of color and freshness to the filling.
- Tortillas: Small flour or corn tortillas are perfect for wrapping up your delicious filling. Choose based on your preference!
- Cooking spray or olive oil: A light brush of oil helps achieve that golden, crispy exterior.
- Dips: Guacamole, sour cream, and salsa are perfect accompaniments for serving. They add extra flavor and creaminess.
- Garnishes: Shredded lettuce, diced tomatoes, and extra cheese can make your taquitos look even more appetizing!

How to Make Baked Cream Cheese Chicken Taquitos
Step 1: Preheat the Oven
Preheating your oven is crucial for achieving that perfect crispy texture. Set your oven to 200°C (400°F) and let it warm up while you prepare the filling. This way, your taquitos will bake evenly and come out golden brown, just like you want them!
Step 2: Prepare the Filling
In a mixing bowl, combine the cooked shredded chicken, softened cream cheese, and shredded cheese. Add the salsa, ground cumin, chili powder, salt, and pepper. If you’re feeling adventurous, toss in some chopped green onions or cilantro for a fresh twist. Mix everything until it’s creamy and well-blended. The filling should be rich and flavorful, making your taquitos irresistible!
Step 3: Warm the Tortillas
Warming the tortillas is essential for easy rolling. You can do this by placing them in a microwave for about 20 seconds or heating them in a dry skillet for a minute on each side. This step makes the tortillas pliable, preventing them from cracking when you fill and roll them.
Step 4: Assemble the Taquitos
Now comes the fun part! Take a warm tortilla and spoon a generous portion of the creamy chicken filling onto the center. Roll the tortilla tightly, tucking in the sides as you go to keep the filling secure. Place the rolled taquito seam-side down on a baking sheet lined with parchment paper. Repeat this process until all your filling is used up. It’s like wrapping little gifts of flavor!
Step 5: Bake the Taquitos
Once your taquitos are assembled, brush the tops lightly with cooking spray or olive oil. This will help them achieve that golden, crispy finish. Bake them in the preheated oven for 15-20 minutes, or until they’re beautifully golden brown. Keep an eye on them to ensure they don’t over-bake!
Step 6: Serve and Enjoy
When your taquitos are out of the oven, let them cool for a minute. Serve them warm with guacamole, sour cream, and salsa for dipping. You can also sprinkle some shredded lettuce and diced tomatoes on top for a fresh touch. Enjoy every crispy, creamy bite!
PrintBaked Cream Cheese Chicken Taquitos That Wow Your Taste Buds!

Delicious baked taquitos filled with creamy chicken and cheese, perfect for a snack or appetizer.
- Prep Time: 15 minutes
- Cook Time: 20 minutes
- Total Time: 35 minutes
- Yield: 4 servings 1x
- Category: Appetizer
- Method: Baking
- Cuisine: Mexican
- Diet: Gluten Free
Ingredients
- 280 g cooked shredded chicken
- 113 g cream cheese, softened
- 56 g shredded cheddar or Monterey Jack cheese
- 60 ml salsa, preferred heat level
- 1 teaspoon ground cumin
- 1 teaspoon chili powder
- Salt, to taste
- Freshly ground black pepper, to taste
- 25 g chopped green onions or fresh cilantro (optional)
- 8 to 10 small flour or corn tortillas, 15 cm size
- Cooking spray or olive oil, for brushing
- Guacamole, for dipping
- Sour cream, for dipping
- Salsa or fresh pico de gallo, for dipping
- Shredded lettuce, for garnish (optional)
- Diced tomatoes, for garnish (optional)
- Extra cheese, for garnish (optional)
Instructions
- Preheat the oven to 200°C (400°F).
- In a mixing bowl, combine the shredded chicken, cream cheese, cheddar or Monterey Jack cheese, salsa, ground cumin, chili powder, salt, black pepper, and green onions or cilantro (if using).
- Mix until well combined.
- Warm the tortillas slightly to make them pliable.
- Spoon a portion of the chicken filling onto each tortilla and roll them tightly.
- Place the rolled taquitos seam-side down on a baking sheet lined with parchment paper.
- Brush the tops with cooking spray or olive oil.
- Bake in the preheated oven for 15-20 minutes or until golden and crispy.
- Serve with guacamole, sour cream, salsa, and garnishes as desired.
Notes
- For a spicier kick, use hot salsa or add jalapeños to the filling.
- These taquitos can be frozen before baking; just add a few extra minutes to the baking time if cooking from frozen.
- Feel free to customize the filling with your favorite ingredients.
Nutrition
- Serving Size: 2 taquitos
- Calories: 300
- Sugar: 2 g
- Sodium: 600 mg
- Fat: 15 g
- Saturated Fat: 7 g
- Unsaturated Fat: 5 g
- Trans Fat: 0 g
- Carbohydrates: 30 g
- Fiber: 2 g
- Protein: 15 g
- Cholesterol: 50 mg
Tips for Success
- Use leftover chicken for a quick prep—it’s a time-saver!
- Don’t skip warming the tortillas; it makes rolling easier.
- Experiment with different cheeses for unique flavors.
- For extra crunch, bake the taquitos on a wire rack.
- Make a double batch and freeze some for busy nights!
Equipment Needed
- Baking sheet: A standard baking sheet works perfectly. If you have a wire rack, use it for extra crispiness.
- Parchment paper: This helps prevent sticking. If you don’t have it, lightly greasing the baking sheet will do.
- Mixing bowl: Any large bowl will suffice for mixing your filling.
- Spatula: A spatula is handy for mixing and transferring the filling.
- Microwave or skillet: Use either to warm your tortillas quickly.
Variations of Baked Cream Cheese Chicken Taquitos
- Spicy Taquitos: Add diced jalapeños or use spicy salsa for an extra kick!
- Vegetarian Option: Substitute shredded chicken with black beans, corn, and diced bell peppers for a hearty filling.
- Cheesy Spinach Taquitos: Mix in some fresh spinach and extra cheese for a creamy, cheesy twist.
- BBQ Chicken Taquitos: Replace salsa with your favorite BBQ sauce for a smoky flavor.
- Gluten-Free Option: Use gluten-free tortillas to make these taquitos suitable for gluten-sensitive diets.
Serving Suggestions for Baked Cream Cheese Chicken Taquitos
- Pair with a fresh garden salad for a light and balanced meal.
- Serve alongside crispy tortilla chips for extra crunch.
- Offer a variety of dips like guacamole, sour cream, and salsa for a fun tasting experience.
- For drinks, consider a refreshing margarita or iced tea.
- Garnish with fresh cilantro or lime wedges for a vibrant presentation!
FAQs about Baked Cream Cheese Chicken Taquitos
Can I make Baked Cream Cheese Chicken Taquitos ahead of time?
Absolutely! You can prepare the filling and assemble the taquitos in advance. Just store them in the fridge for up to 24 hours before baking. This makes it super convenient for busy days!
How do I store leftover taquitos?
Store any leftover Baked Cream Cheese Chicken Taquitos in an airtight container in the fridge for up to three days. Reheat them in the oven for a few minutes to regain that crispy texture.
Can I freeze these taquitos?
Yes! These taquitos freeze beautifully. Just assemble them, place them on a baking sheet, and freeze until solid. Then transfer them to a freezer bag. Bake from frozen, adding a few extra minutes to the cooking time.
What can I serve with Baked Cream Cheese Chicken Taquitos?
These taquitos pair wonderfully with guacamole, sour cream, and salsa. You can also serve them with a fresh salad or crispy tortilla chips for a complete meal!
Can I customize the filling?
Definitely! Feel free to get creative with the filling. You can add veggies, different cheeses, or even swap the chicken for beans for a vegetarian option. The possibilities are endless!
Final Thoughts
Making Baked Cream Cheese Chicken Taquitos is more than just cooking; it’s about creating joyful moments with family and friends. The aroma wafting through your kitchen as they bake is simply irresistible. Each crispy bite is a delightful explosion of creamy goodness that brings smiles all around. Whether you’re hosting a gathering or enjoying a cozy night in, these taquitos are sure to impress. Plus, they’re easy to customize, making them a versatile addition to your recipe repertoire. So roll up your sleeves, gather your loved ones, and dive into this delicious adventure together!