
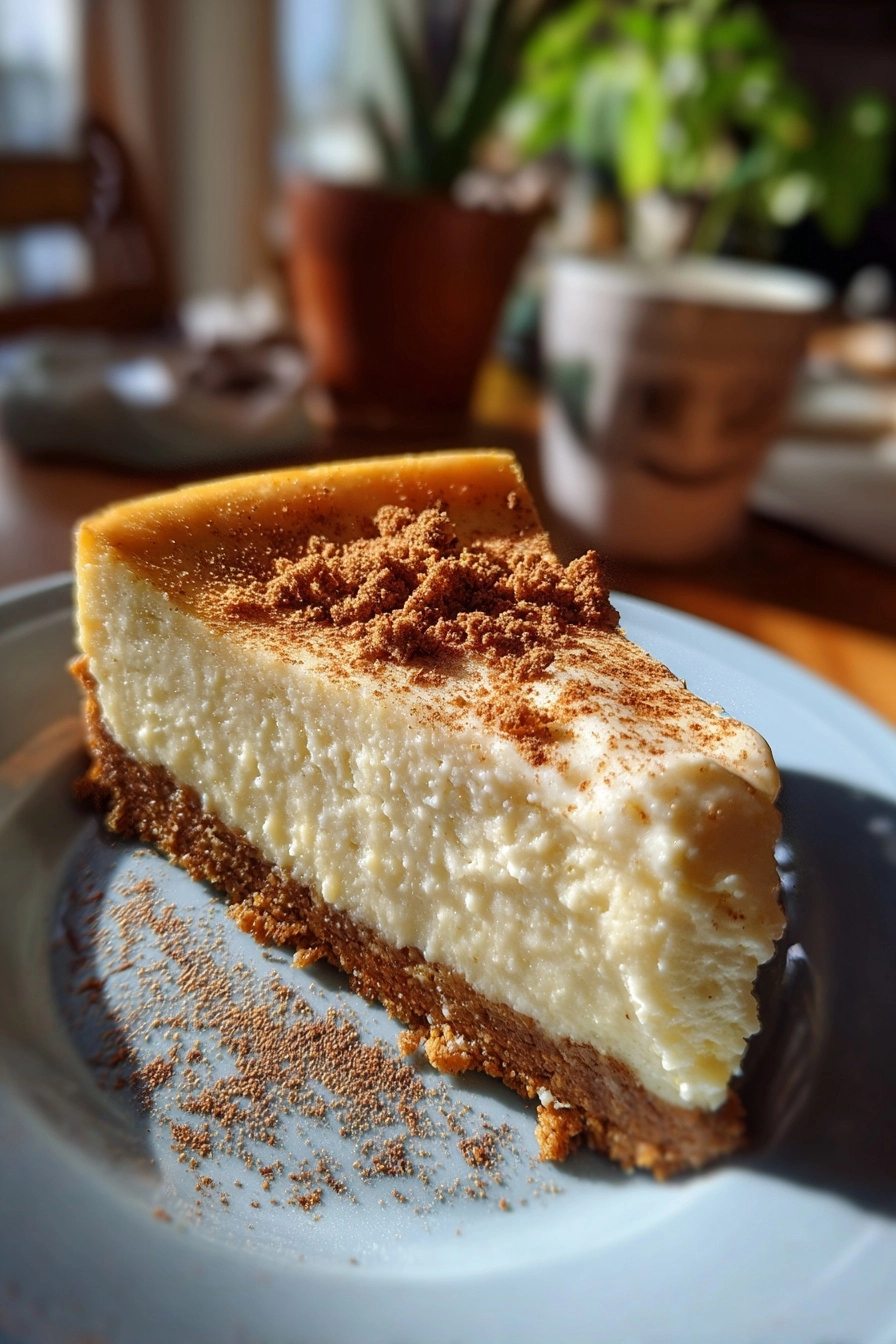
Introduction to Apple Cider Cheesecake
As the leaves turn and the air gets crisp, there’s nothing quite like the comforting aroma of fall wafting through your kitchen. That’s where my apple cider cheesecake comes in—a delightful dessert that captures the essence of autumn in every bite. This creamy, flavorful cheesecake is not just a treat; it’s a quick solution for busy days when you want to impress your loved ones without spending hours in the kitchen. Trust me, this recipe will become a cherished favorite, perfect for gatherings or a cozy night in with family.
Why You’ll Love This Apple Cider Cheesecake
This apple cider cheesecake is a game-changer for busy moms and professionals alike. It’s incredibly easy to whip up, taking just over an hour of your time, including baking. The taste? Oh, it’s like a warm hug on a chilly day! With its creamy texture and hints of cinnamon and nutmeg, it’s a dessert that will have everyone asking for seconds. Plus, it’s a fantastic way to celebrate the flavors of fall!
Ingredients for Apple Cider Cheesecake
Gathering the right ingredients is the first step to creating your apple cider cheesecake masterpiece. Here’s what you’ll need:
- Graham cracker crumbs: These form the base of your cheesecake crust, providing a sweet and crunchy texture.
- Unsalted butter: Melted butter binds the crumbs together, adding richness to the crust.
- Granulated sugar: This sweetens the cheesecake filling, balancing the tartness of the apple cider.
- Cream cheese: The star of the show! Softened cream cheese gives the cheesecake its creamy, velvety texture.
- Apple cider: This is where the magic happens! It infuses the cheesecake with a delightful fall flavor.
- Eggs: They help set the cheesecake, giving it structure and a smooth consistency.
- Vanilla extract: A splash of vanilla enhances the overall flavor, making it even more delicious.
- Ground cinnamon: This warm spice adds a cozy touch, reminiscent of autumn baking.
- Ground nutmeg: Just a pinch brings a subtle depth of flavor that complements the cinnamon beautifully.
For those looking to experiment, you can reduce the apple cider to 3/4 cup for a more intense apple flavor. And don’t forget, the exact quantities of these ingredients are listed at the bottom of the article for your convenience!
How to Make Apple Cider Cheesecake
Now that you have your ingredients ready, let’s dive into the steps to create this delicious apple cider cheesecake. Each step is simple, and I promise you’ll feel like a pro in no time!
Step 1: Preheat the Oven
First things first, preheat your oven to 325°F (160°C). Preheating is crucial for baking cheesecake. It ensures that the cheesecake cooks evenly, giving you that perfect creamy texture. Trust me, you don’t want to skip this step!
Step 2: Prepare the Crust
In a mixing bowl, combine your graham cracker crumbs and melted butter. Stir until the crumbs are fully coated. This mixture should feel like wet sand. Now, press it firmly into the bottom of your springform pan. Make sure it’s compact; this will help your crust hold together beautifully when you slice into the cheesecake.
Step 3: Make the Filling
In a large mixing bowl, beat the softened cream cheese and granulated sugar together until smooth. This is where the magic begins! Next, add in the apple cider, eggs, vanilla extract, ground cinnamon, and nutmeg. Mix until everything is well combined. The aroma will be heavenly, and you’ll be tempted to taste it—go ahead, I won’t tell!
Step 4: Assemble the Cheesecake
Now it’s time to pour that luscious filling over your prepared crust. Use a spatula to spread it evenly, ensuring every corner is filled. This step is key for a beautiful presentation. You want your cheesecake to look as good as it tastes!
Step 5: Bake the Cheesecake
Place your cheesecake in the preheated oven and bake for 50-60 minutes. Keep an eye on it! The center should be set but still slightly jiggly. This means it will firm up as it cools. If you notice the edges browning too quickly, you can cover them with foil.
Step 6: Cool and Refrigerate
Once baked, remove the cheesecake from the oven and let it cool at room temperature for about an hour. Then, refrigerate it for at least 4 hours, or overnight if you can wait! This chilling time is essential for achieving that creamy texture we all love. Plus, it allows the flavors to meld beautifully.
Tips for Success
- Use room temperature cream cheese for a smoother filling.
- Don’t overmix the filling; this helps prevent cracks.
- Let the cheesecake cool gradually to avoid sudden temperature changes.
- For a festive touch, sprinkle extra cinnamon on top before serving.
- Consider using a water bath for even baking and a creamier texture.
Equipment Needed
- Springform pan: Essential for easy removal of your cheesecake. A regular cake pan works too, but slicing will be trickier.
- Mixing bowls: Use a large bowl for the filling and a smaller one for the crust.
- Electric mixer: A hand mixer or stand mixer makes beating the cream cheese a breeze.
- Spatula: Perfect for spreading the filling evenly over the crust.
- Measuring cups and spoons: Accurate measurements are key to a successful cheesecake!
Variations
- Caramel Apple Cider Cheesecake: Drizzle caramel sauce over the top before serving for an extra layer of sweetness.
- Gluten-Free Option: Substitute graham cracker crumbs with gluten-free cookies or almond flour for a delicious gluten-free crust.
- Vegan Version: Use vegan cream cheese and replace eggs with flaxseed meal mixed with water for a plant-based alternative.
- Spiced Apple Cider Cheesecake: Add a pinch of ground ginger or allspice to the filling for a spicier flavor profile.
- Mini Cheesecakes: Pour the filling into muffin tins for individual servings, perfect for parties or gatherings!
Serving Suggestions
- Top each slice with a dollop of whipped cream for a creamy contrast.
- Garnish with thin apple slices or a sprinkle of cinnamon for a festive touch.
- Pair with a warm cup of spiced cider or coffee to enhance the flavors.
- Serve on a beautiful platter to impress your guests.
- Consider adding a drizzle of caramel sauce for an extra indulgent treat!
FAQs about Apple Cider Cheesecake
As you embark on your apple cider cheesecake journey, you might have a few questions. Here are some common queries I’ve encountered, along with helpful answers to guide you along the way!
Can I use store-bought apple cider for this recipe?
Absolutely! Store-bought apple cider works perfectly. Just make sure it’s fresh and not overly sweetened. This will help maintain the balance of flavors in your cheesecake.
How do I know when my cheesecake is done baking?
Great question! The center should be set but still slightly jiggly. It will firm up as it cools. If the edges start to brown too much, cover them with foil to prevent overcooking.
Can I freeze apple cider cheesecake?
Yes, you can! Just wrap it tightly in plastic wrap and then in aluminum foil. It can be frozen for up to three months. Thaw it in the fridge overnight before serving.
What can I do if my cheesecake cracks?
Cracks can happen, but don’t worry! If it does crack, you can cover it with whipped cream or a fruit topping. It’ll still taste delicious, and no one will notice!
How long can I store leftovers?
Your apple cider cheesecake can be stored in the refrigerator for up to five days. Just make sure it’s covered to keep it fresh and tasty!
Final Thoughts
Creating this apple cider cheesecake is more than just baking; it’s about embracing the warmth of fall and sharing joy with loved ones. Each slice is a celebration of flavors that brings smiles and happy memories to the table. Whether it’s a family gathering or a cozy night in, this dessert is sure to impress. Plus, the delightful aroma that fills your kitchen is simply irresistible! So, roll up your sleeves, gather your ingredients, and let this apple cider cheesecake become a cherished tradition in your home. Trust me, you won’t regret it!
PrintApple cider cheesecake: A delicious dessert delight!

A creamy and flavorful cheesecake infused with the taste of apple cider, perfect for fall gatherings.
- Prep Time: 20 minutes
- Cook Time: 60 minutes
- Total Time: 4 hours 20 minutes
- Yield: 12 servings 1x
- Category: Dessert
- Method: Baking
- Cuisine: American
- Diet: Vegetarian
Ingredients
- 1 1/2 cups graham cracker crumbs
- 1/2 cup unsalted butter, melted
- 1 cup granulated sugar
- 3 (8 oz) packages cream cheese, softened
- 1 cup apple cider
- 3 large eggs
- 1 teaspoon vanilla extract
- 1 teaspoon ground cinnamon
- 1/4 teaspoon ground nutmeg
Instructions
- Preheat the oven to 325°F (160°C).
- In a bowl, mix graham cracker crumbs and melted butter until combined.
- Press the mixture into the bottom of a springform pan to form the crust.
- In a large mixing bowl, beat the cream cheese and sugar until smooth.
- Add the apple cider, eggs, vanilla extract, cinnamon, and nutmeg, and mix until well combined.
- Pour the cheesecake filling over the crust in the springform pan.
- Bake for 50-60 minutes or until the center is set.
- Allow to cool, then refrigerate for at least 4 hours before serving.
Notes
- For a stronger apple flavor, reduce the apple cider to 3/4 cup.
- Top with whipped cream and apple slices for garnish.
- Store leftovers in the refrigerator for up to 5 days.
Nutrition
- Serving Size: 1 slice
- Calories: 350
- Sugar: 25g
- Sodium: 300mg
- Fat: 22g
- Saturated Fat: 12g
- Unsaturated Fat: 8g
- Trans Fat: 0g
- Carbohydrates: 30g
- Fiber: 1g
- Protein: 5g
- Cholesterol: 80mg