
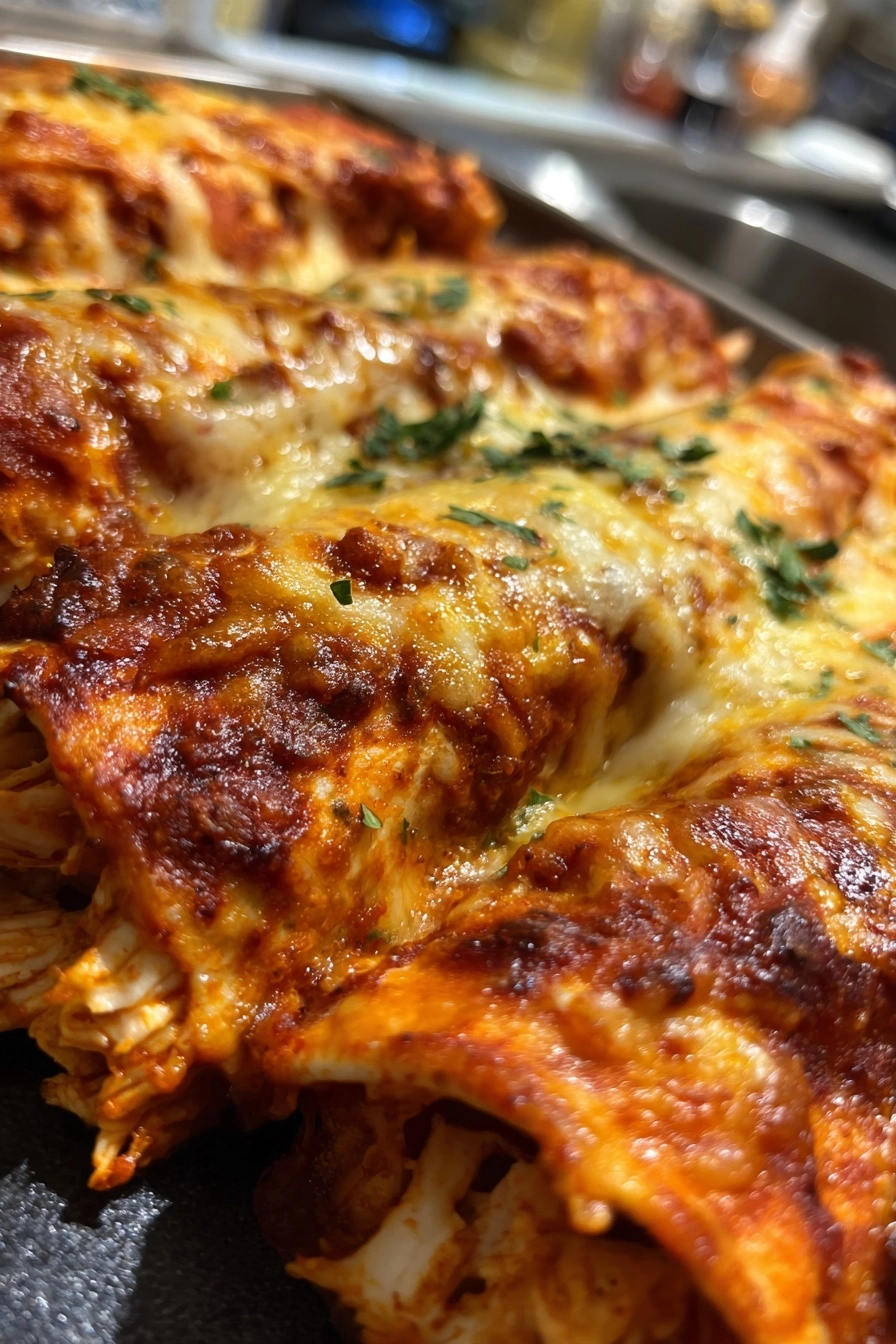
Gluten-Free Chicken Enchiladas
As a busy mom, I know how challenging it can be to whip up a meal that pleases everyone. That’s why I adore these Gluten-Free Chicken Enchiladas. They’re not just a quick solution for a hectic weeknight; they’re also a dish that brings smiles to the dinner table. With tender chicken wrapped in warm tortillas and smothered in zesty enchilada sauce, this recipe is a crowd-pleaser. Plus, they’re gluten-free, making them perfect for those with dietary restrictions. Trust me, your family will be asking for seconds!
Why You’ll Love This Gluten-Free Chicken Enchiladas
These Gluten-Free Chicken Enchiladas are a lifesaver for busy nights. They come together in just 40 minutes, making them perfect for those evenings when time is tight. The flavors are simply irresistible, with a delightful blend of spices that will have your taste buds dancing. Plus, they’re versatile! You can customize the filling to suit your family’s preferences, ensuring everyone leaves the table happy and satisfied.
Ingredients for Gluten-Free Chicken Enchiladas
Gathering the right ingredients is key to making these Gluten-Free Chicken Enchiladas a hit. Here’s what you’ll need:
- Cooked shredded chicken: This is the star of the show! You can use rotisserie chicken for convenience or cook your own.
- Gluten-free enchilada sauce: Look for a brand that’s rich and flavorful. You can also make your own if you’re feeling adventurous!
- Gluten-free tortillas: These are essential for wrapping up your delicious filling. Corn tortillas are a great option, but check the label to ensure they’re gluten-free.
- Shredded cheese: I love using a blend of cheeses for extra flavor. Cheddar or Monterey Jack works beautifully.
- Diced onions: They add a sweet crunch and depth to the filling. You can use yellow, white, or even red onions for a pop of color.
- Chopped bell peppers: These bring a lovely sweetness and vibrant color. Feel free to mix and match colors for a fun presentation!
- Olive oil: This is used for sautéing the veggies. It adds a nice richness to the dish.
- Cumin: A warm spice that gives the enchiladas a hint of earthiness. It’s a must-have in Mexican cuisine!
- Garlic powder: This adds a savory depth to the chicken mixture. Fresh garlic works too if you prefer.
- Salt and pepper: Essential for seasoning. Adjust to your taste for the perfect flavor balance.
Feel free to get creative! You can add your favorite vegetables to the filling or even swap out the chicken for beans for a vegetarian option. For exact quantities, check the bottom of the article where you can find everything available for printing.
How to Make Gluten-Free Chicken Enchiladas
Now that you have all your ingredients ready, let’s dive into making these delicious Gluten-Free Chicken Enchiladas. Follow these simple steps, and you’ll have a mouthwatering meal in no time!
Step 1: Preheat the Oven
First things first, preheat your oven to 375°F (190°C). Preheating is crucial because it ensures even cooking. You want that cheese to melt perfectly and the flavors to meld beautifully.
Step 2: Sauté the Vegetables
Next, grab a skillet and heat a tablespoon of olive oil over medium heat. Once the oil is shimmering, toss in the diced onions and chopped bell peppers. Sauté them for about 5 minutes until they’re soft and fragrant. This step adds a lovely sweetness to your filling!
Step 3: Prepare the Chicken Mixture
Now it’s time to add the star of the show! Stir in the cooked shredded chicken along with cumin, garlic powder, salt, and pepper. Mix everything well, allowing the spices to coat the chicken and veggies. This is where the magic happens, and your kitchen will start to smell heavenly!
Step 4: Assemble the Enchiladas
In a baking dish, spread a thin layer of enchilada sauce on the bottom. This prevents sticking and adds flavor. Take a gluten-free tortilla, fill it with the chicken mixture, and roll it up tightly. Place each rolled tortilla seam-side down in the dish. Repeat until all the filling is used up!
Step 5: Bake the Enchiladas
Pour the remaining enchilada sauce over the top of the rolled tortillas. Don’t be shy—make sure they’re well covered! Sprinkle shredded cheese generously on top. Now, pop the dish into the preheated oven and bake for 20-25 minutes. You’ll know they’re ready when the cheese is melted and bubbly, creating a golden crust.
Step 6: Serve and Enjoy
Once baked, let the enchiladas cool for a few minutes. This helps the flavors settle and makes them easier to serve. Then, dig in! You’ll be amazed at how satisfying these Gluten-Free Chicken Enchiladas are. Enjoy every bite!
Tips for Success
- Use rotisserie chicken for a quick and easy filling.
- Warm the tortillas slightly before filling to prevent cracking.
- Experiment with different cheeses for unique flavors.
- Let the enchiladas cool for a few minutes before serving to enhance the flavors.
- Store leftovers in an airtight container for up to three days.
Equipment Needed
- Skillet: A non-stick skillet works best, but any frying pan will do.
- Baking dish: A 9×13 inch dish is ideal, but any oven-safe dish can be used.
- Spatula: For mixing and serving the enchiladas.
- Measuring cups: Helpful for portioning ingredients, though not strictly necessary.
Variations
- Vegetarian Option: Swap the chicken for black beans or lentils for a hearty, meat-free meal.
- Spicy Kick: Add diced jalapeños or a splash of hot sauce to the chicken mixture for an extra kick.
- Cheesy Delight: Mix in cream cheese or sour cream with the chicken for a creamy filling.
- Different Proteins: Try shredded beef or turkey for a different flavor profile.
- Herb Infusion: Add fresh cilantro or parsley to the filling for a burst of freshness.
Serving Suggestions
- Fresh Salad: Pair your enchiladas with a crisp green salad for a refreshing contrast.
- Guacamole: Serve with a side of creamy guacamole for added richness.
- Rice: Cilantro-lime rice complements the flavors beautifully.
- Drinks: Enjoy with a chilled margarita or sparkling water with lime.
- Presentation: Garnish with fresh cilantro and a squeeze of lime for a pop of color.
FAQs about Gluten-Free Chicken Enchiladas
As you embark on your culinary adventure with these Gluten-Free Chicken Enchiladas, you might have a few questions. Here are some common queries that I’ve encountered, along with helpful answers!
Can I make these enchiladas ahead of time?
Absolutely! You can prepare the enchiladas, assemble them in the baking dish, and cover them tightly. Store them in the refrigerator for up to 24 hours before baking. Just add a few extra minutes to the baking time if they’re cold from the fridge.
What can I substitute for the chicken?
If you’re looking for a different protein, shredded beef or turkey works wonderfully. For a vegetarian option, consider using black beans or lentils. They’ll still pack a flavorful punch!
How do I store leftovers?
Leftover Gluten-Free Chicken Enchiladas can be stored in an airtight container in the refrigerator for up to three days. Reheat them in the oven or microwave until warmed through.
Can I freeze these enchiladas?
Yes! These enchiladas freeze beautifully. Just assemble them, cover tightly, and freeze before baking. When you’re ready to enjoy, thaw in the fridge overnight and bake as directed.
What sides pair well with enchiladas?
For a complete meal, serve your enchiladas with a fresh salad, guacamole, or cilantro-lime rice. These sides complement the flavors perfectly and add a delightful crunch!
Summarizing the Joy of Gluten-Free Chicken Enchiladas
There’s something truly special about gathering around the table to enjoy a warm plate of Gluten-Free Chicken Enchiladas. The aroma fills the air, and laughter dances with every bite. This dish not only satisfies hunger but also brings families together, creating cherished memories. Whether it’s a busy weeknight or a festive gathering, these enchiladas are a comforting reminder that delicious meals can be simple and quick. I hope you find as much joy in making and sharing this recipe as I do. Here’s to happy cooking and even happier moments with loved ones!
PrintGluten-Free Chicken Enchiladas That Everyone Will Love!

Delicious and satisfying gluten-free chicken enchiladas that are perfect for any occasion.
- Prep Time: 15 minutes
- Cook Time: 25 minutes
- Total Time: 40 minutes
- Yield: 4 servings 1x
- Category: Main Dish
- Method: Baking
- Cuisine: Mexican
- Diet: Gluten Free
Ingredients
- 2 cups cooked shredded chicken
- 1 cup gluten-free enchilada sauce
- 8 gluten-free tortillas
- 1 cup shredded cheese
- 1/2 cup diced onions
- 1/2 cup chopped bell peppers
- 1 tablespoon olive oil
- 1 teaspoon cumin
- 1 teaspoon garlic powder
- Salt and pepper to taste
Instructions
- Preheat the oven to 375°F (190°C).
- In a skillet, heat olive oil over medium heat and sauté onions and bell peppers until soft.
- Add shredded chicken, cumin, garlic powder, salt, and pepper to the skillet and mix well.
- Spread a thin layer of enchilada sauce on the bottom of a baking dish.
- Fill each gluten-free tortilla with the chicken mixture, roll them up, and place them seam-side down in the baking dish.
- Pour the remaining enchilada sauce over the top and sprinkle with shredded cheese.
- Bake for 20-25 minutes or until the cheese is melted and bubbly.
- Let cool for a few minutes before serving.
Notes
- Feel free to add your favorite vegetables to the filling.
- For a spicier version, add jalapeños to the chicken mixture.
- These enchiladas can be made ahead of time and stored in the refrigerator before baking.
Nutrition
- Serving Size: 1 enchilada
- Calories: 350
- Sugar: 3g
- Sodium: 600mg
- Fat: 15g
- Saturated Fat: 7g
- Unsaturated Fat: 5g
- Trans Fat: 0g
- Carbohydrates: 30g
- Fiber: 2g
- Protein: 25g
- Cholesterol: 70mg